

Install writeup: 2wd coil spacer leveling kit
#1
 12-12-2006, 02:25 PM


Join Date: Mar 2006
Location: Katy, TX
Posts: 70
Likes: 0
Received 0 Likes
on
0 Posts
for the short time i've been on this forum, i have noticed there are a lot of people asking about the coil spacer leveling kit. whether the questions are what it does, how much it costs, which brand is best, how to install it, the resulting ride, etc., there is a lot of discussion about them. at the same time, i have also noticed that some of the folks that have them, had them installed by a shop becuase they were not sure about doing it themselves, and still even more guys wanting to install the spacers, but just not sure how to do it, and if they can. of course there are some people on here that have installed these themselves, and to them, feel free to add your thoughts, suggestions, and comments at the end of this write-up. the point is to show how easy this really is to do yourself. with a few hours, a floor jack and jack stand, some hand tools, and a buddy anyone can do this installation. on to the details.....
Vehicle: 2003 Dodge Ram 1500 2wd regular cab, 3.7L V6, 5spd
Product: Daystar 2" Coil Spacer Leveling Kit $85 shipped

Tools/Supplies:
socket wrench/ratchet
MM sockets (13mm-22mm)
floor jack
jack stand
Overview of the Product
Here is the kit:
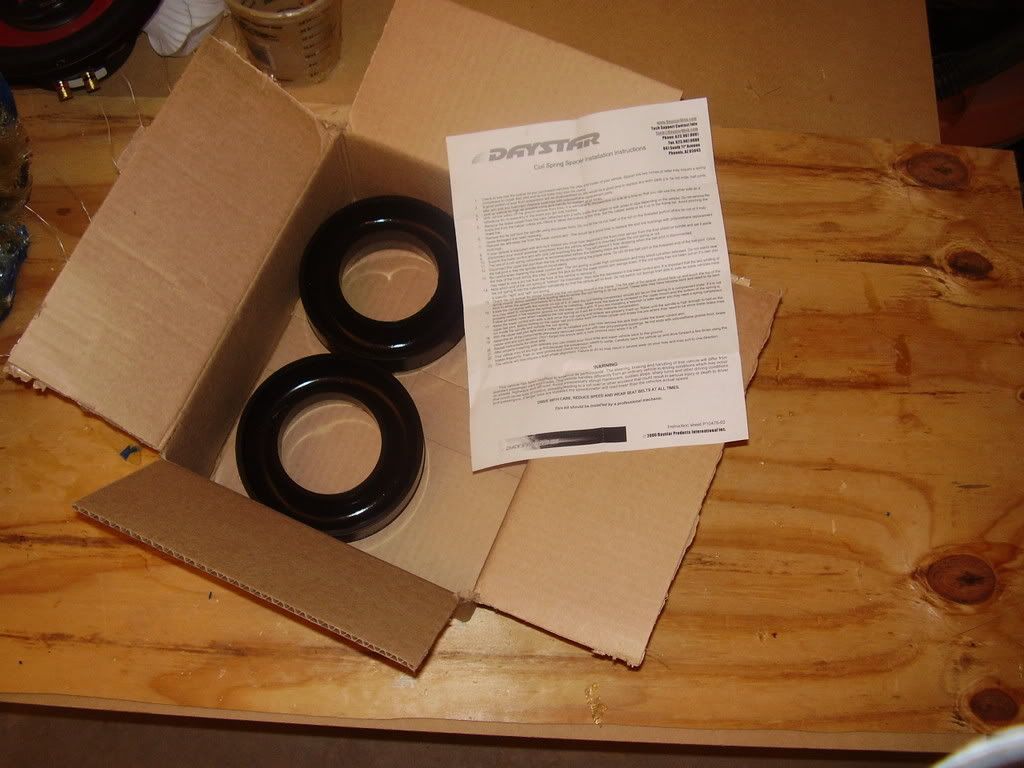
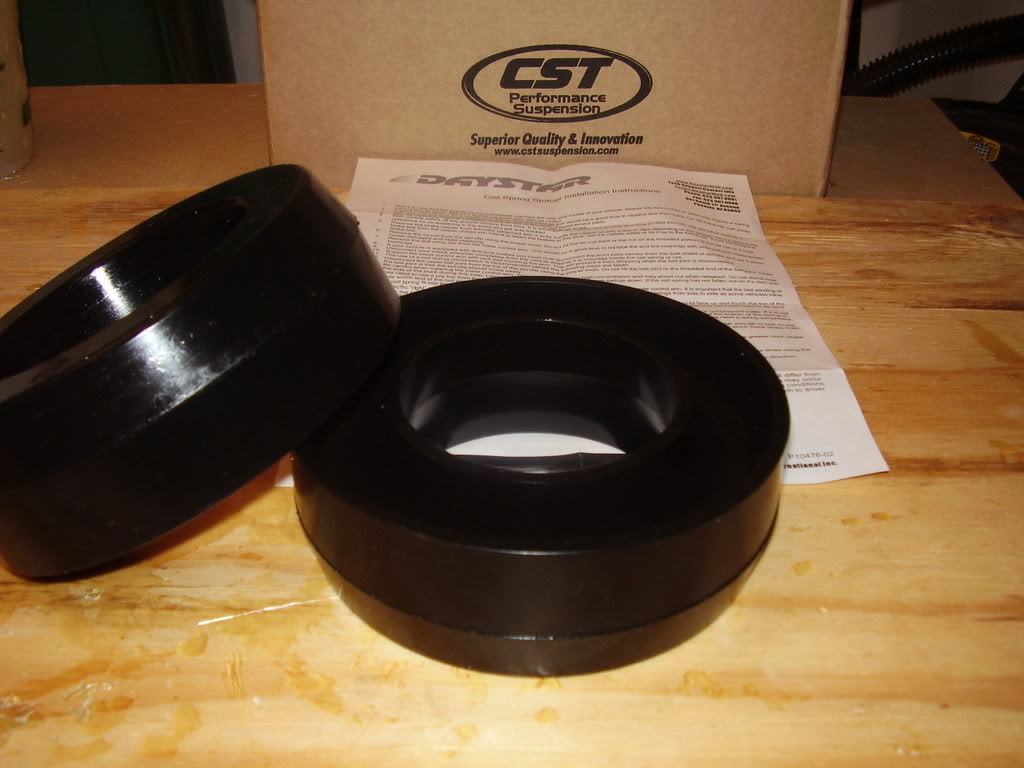
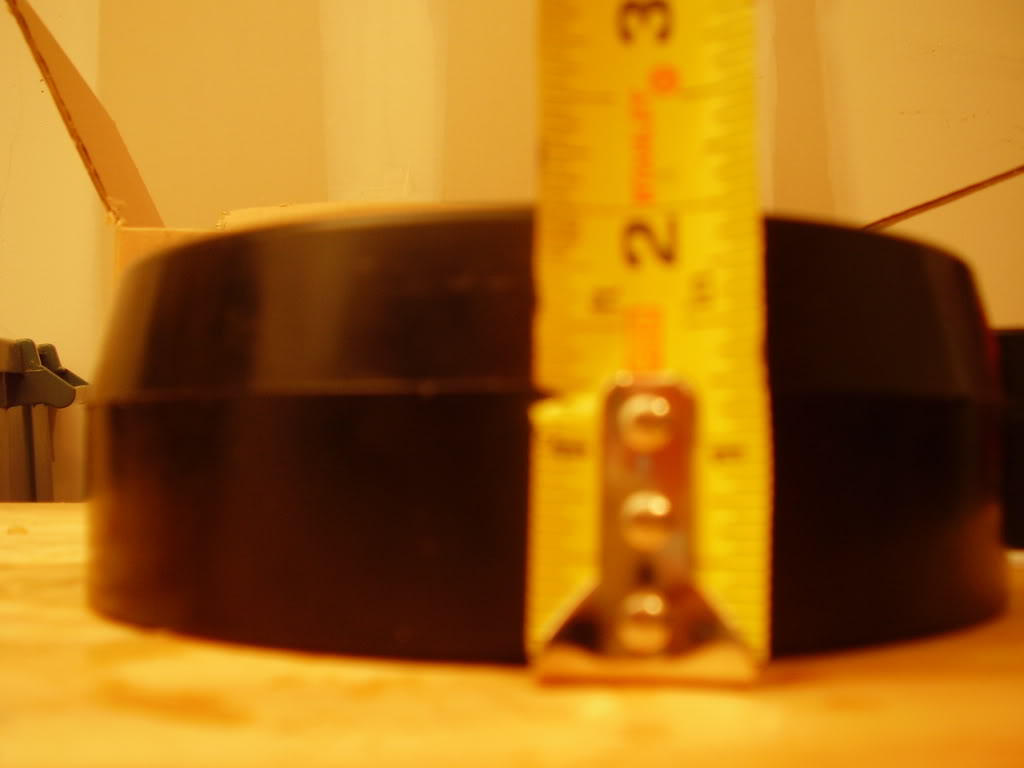
The spacer itself is a solid 2" tall.
Before Picture
i'll have to get the far away whole truck shots off the other computer
On to the Installation
-start on one side and complete that side before moving to the next.
-while the weight of the truck is still on the ground, loosen the lug nuts
-jack the front of the truck up on the side you are working on.
-place the jack stand under the frame as far forward as you can.
-remove the tire.


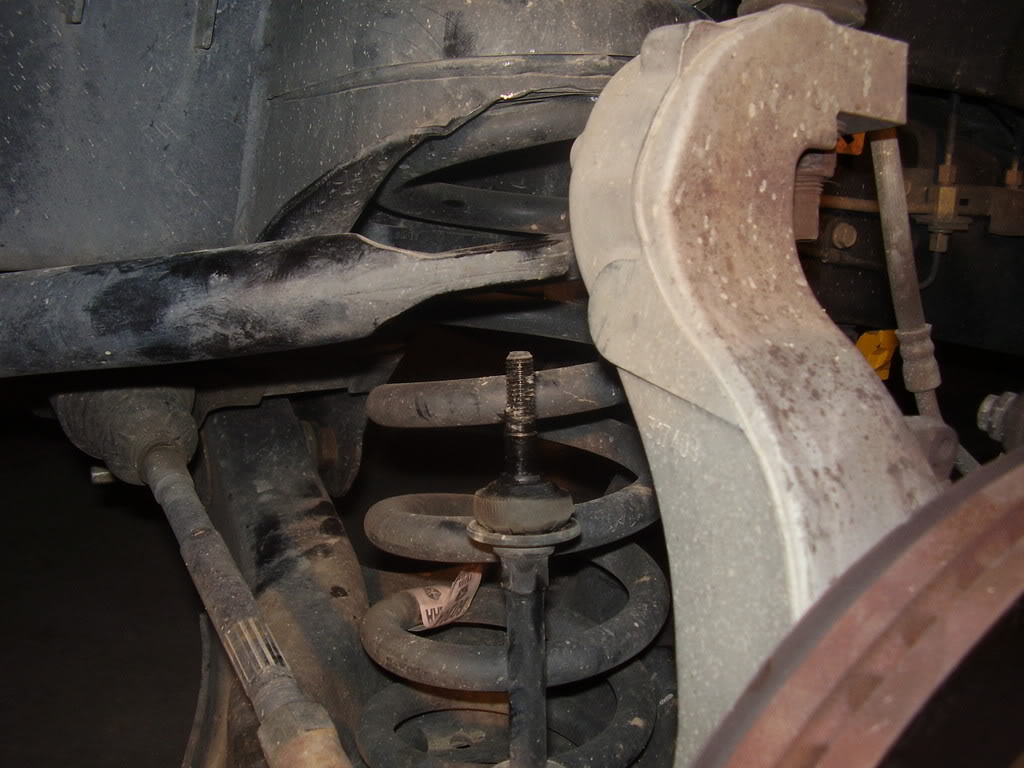
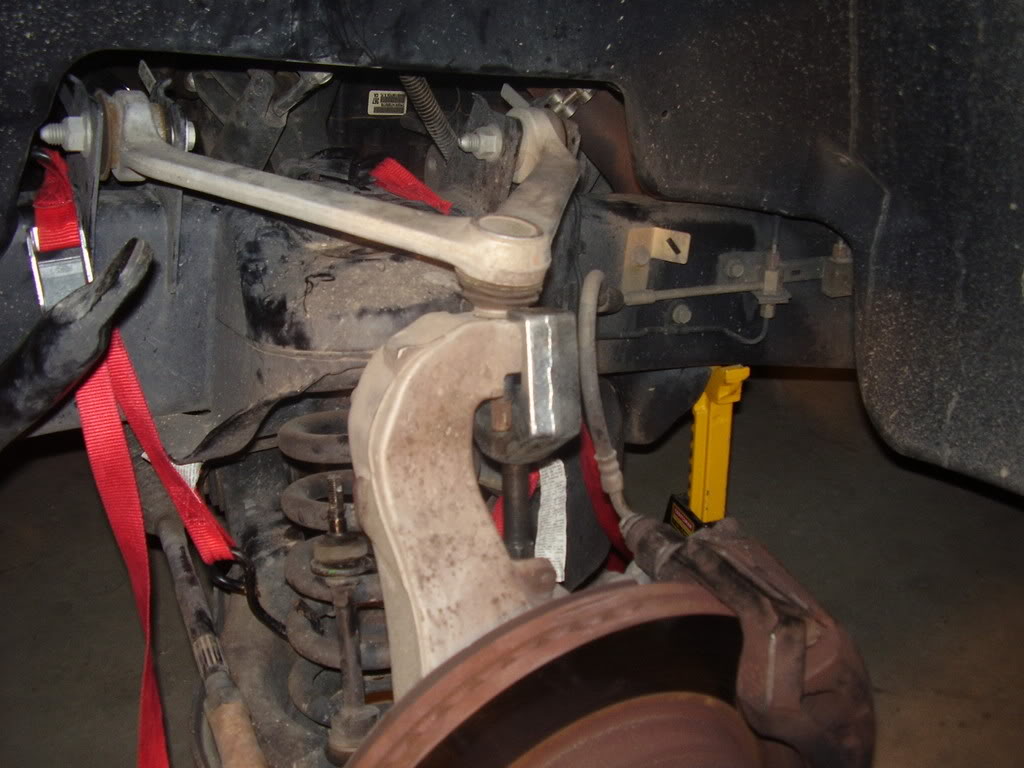
-place the jack under the lower control arm and apply enough pressure to it so the jack will not move. once you start unbolting everything, you really can't be too careful when dealing with the highly compressed coils. we found the best location (after some time) for the jack is the farthest to the edge of the lower control arm. you will see four round headed studs there.
-unbolt the swaybar from the link
-disconnect the tie rod from the spindle. (No picture)
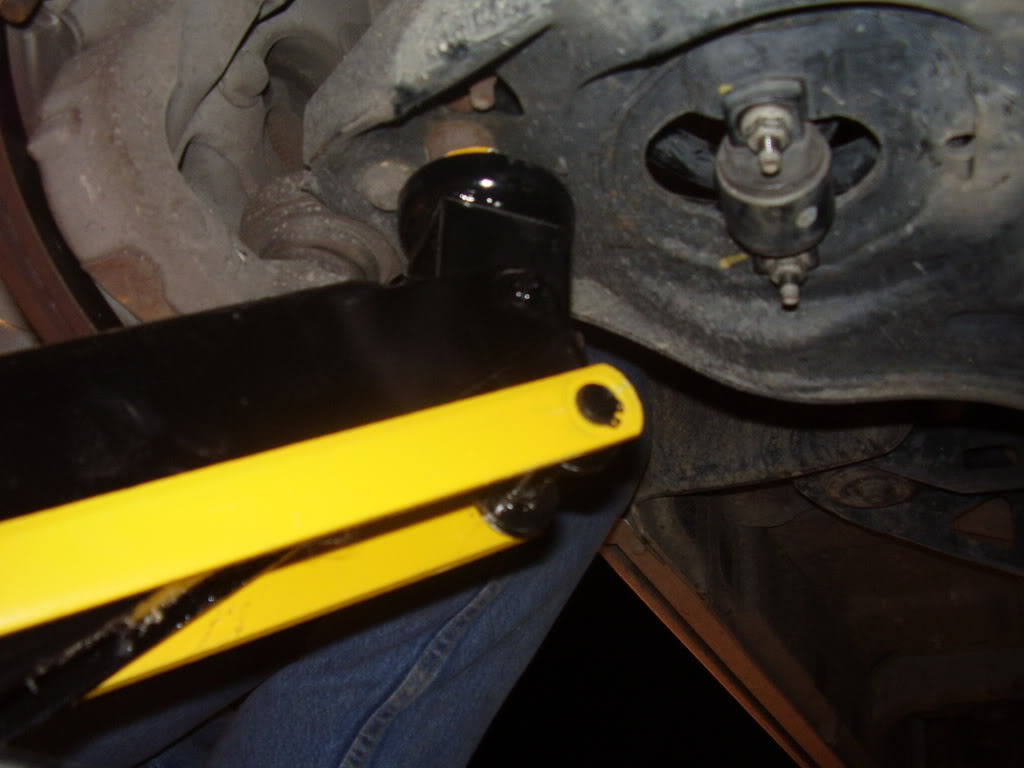
-remove the shock. there are two bolts on the underside of the lower control arm, and one bolt at the top of the upper coil bucket.
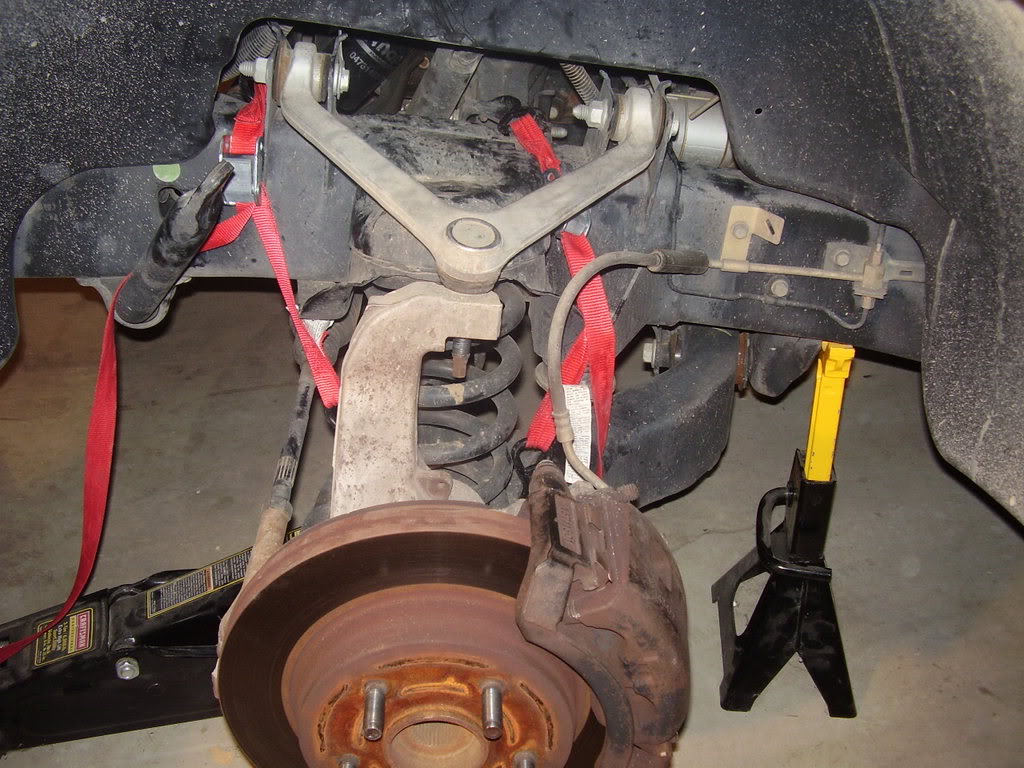
-at this point, i would recommend hooking some straps to the coil and to the frame to keep the coil from popping out. it is not 100% necessary, but as mentioned before, you really can't be to careful, and it only takes a couple seconds to put them on there. admittedly, we did this the first go-round, but not on the second.
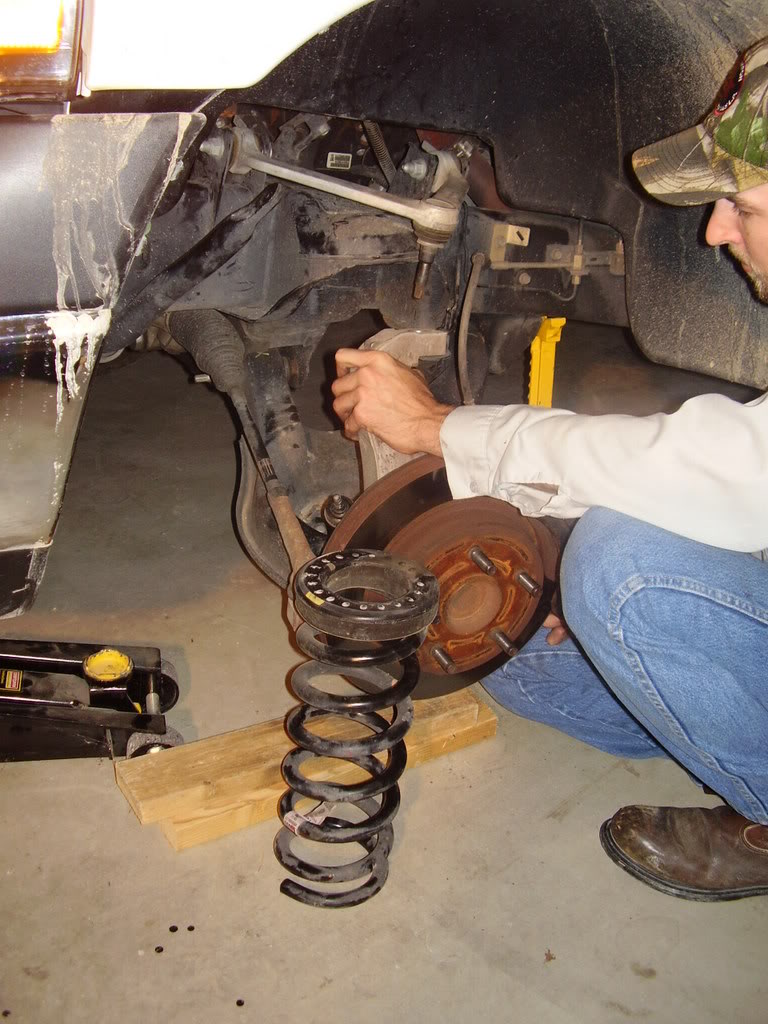
-at this point, remove the brake caliper and rotor. once you are trying to remove and reinstall the coil, you will need as much stretch room to do so, and you risk breaking the brake line if the caliper is still connected as it does not have much slack to move. remove the two bolts from the back of the caliper and hang it out of the way with another strap or some zip ties.
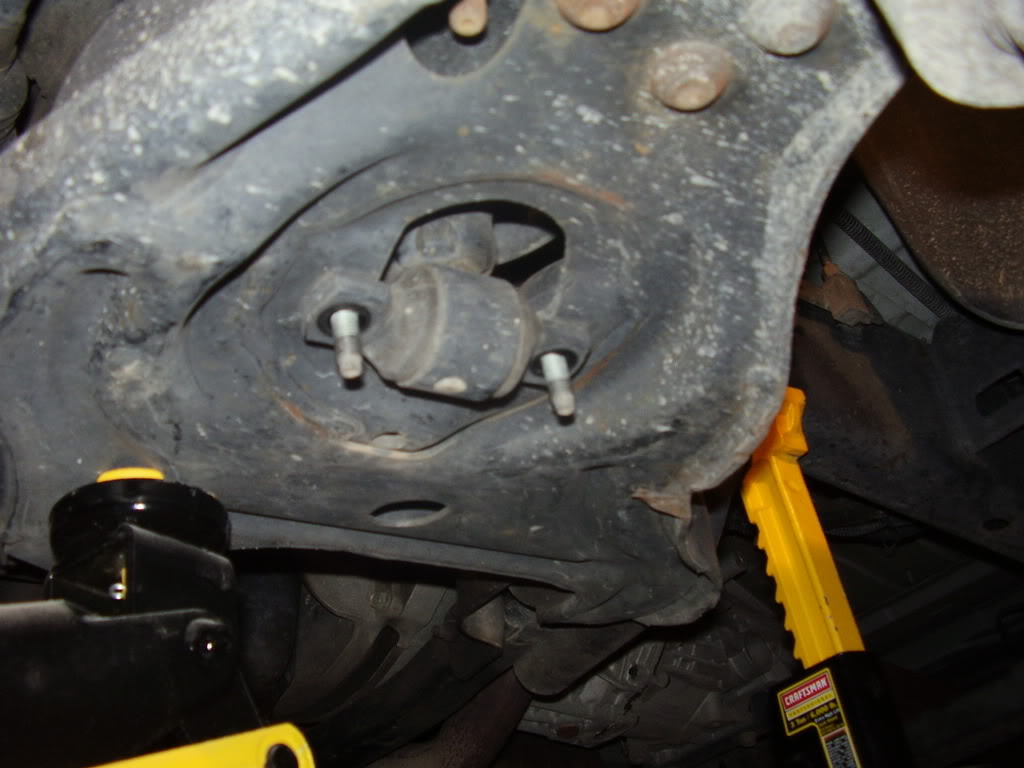
-remove the bolt from the upper balljoint/control arm. Using a hammer, hit the spindle near the UCA ball joint stud. You can also use a pitman arm puller, but a hammer is much faster.
-once the upper control arm is seperated from the spindle, SLOWLY lower the jack releasing the tension from the coil. once the jack is out of the way, you will still need to push down on the LCA to get the coil out. here it is once out, with the stock rubber coil isolator on top. You can throw that away.
-here is the coil isolator next to one of the spacers
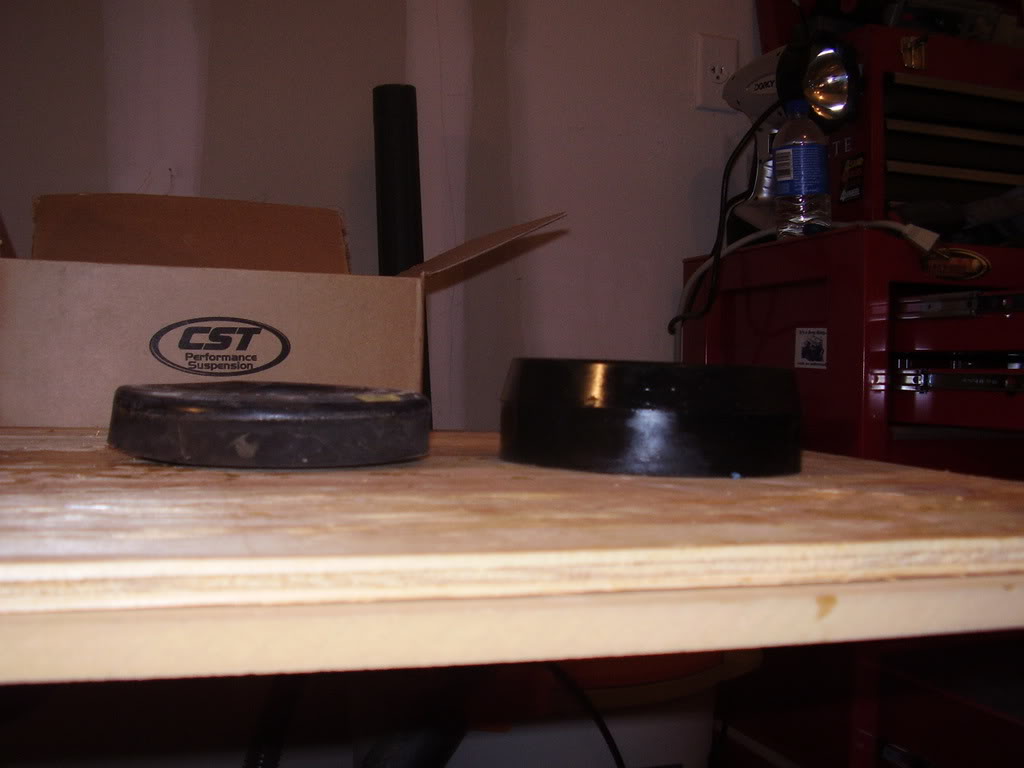
-the spacer on the top of the coil (DO NOT reinstall the factory isolator)
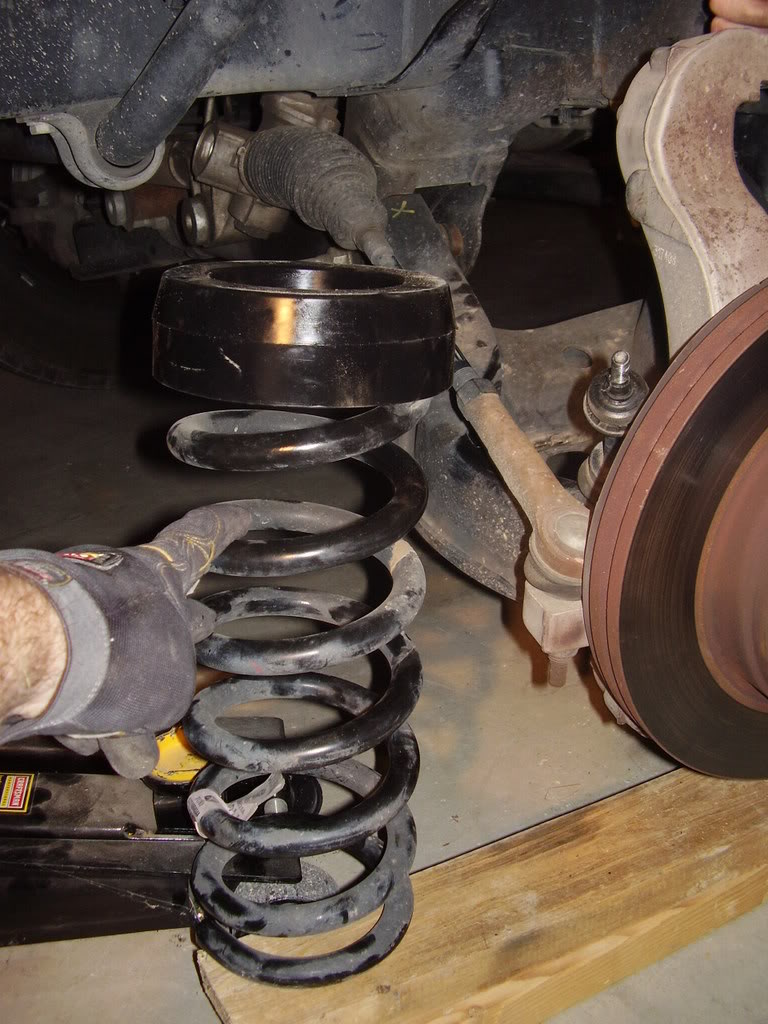
-we found that it helps to just shove the spacer up into the bucket and then put the coil in (the bucket will hold it in place).
-this is where you may find that you need to loosen the lower control arm bolts to allow it to swing down more. This will make more room to fit the coil in place.
Another option would be to use a set of coil compressors; however, that should not be necessary.
-once the coil is reseated in position, jack the lower control arm back up to secure it in place.
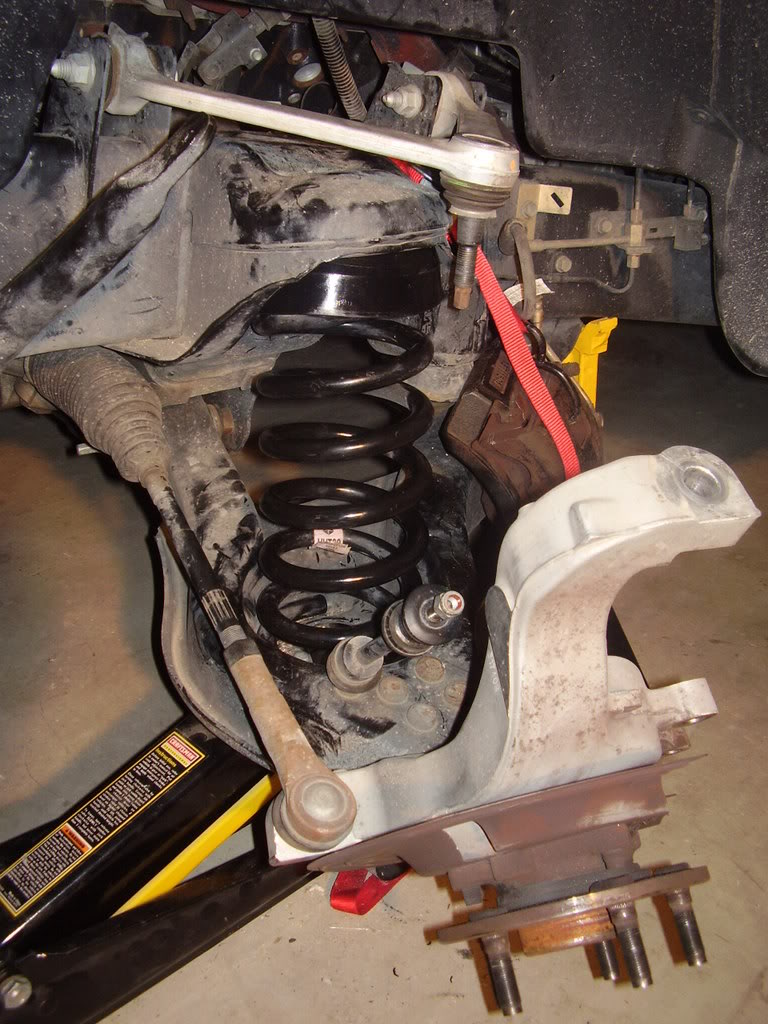
-replace the ball joint bolt through the spindle and rebolt. this will assure everything will stay in place.
-from there, reattach everything else.
-put the tire back on, bolt it up
-remove the jack stand and lower the truck on the ground
-retighten lugs
-repeat on other side.
After
Vehicle: 2003 Dodge Ram 1500 2wd regular cab, 3.7L V6, 5spd
Product: Daystar 2" Coil Spacer Leveling Kit $85 shipped
Tools/Supplies:
socket wrench/ratchet
MM sockets (13mm-22mm)
floor jack
jack stand
Overview of the Product
Here is the kit:
The spacer itself is a solid 2" tall.
Before Picture
i'll have to get the far away whole truck shots off the other computer
On to the Installation
-start on one side and complete that side before moving to the next.
-while the weight of the truck is still on the ground, loosen the lug nuts
-jack the front of the truck up on the side you are working on.
-place the jack stand under the frame as far forward as you can.
-remove the tire.
-place the jack under the lower control arm and apply enough pressure to it so the jack will not move. once you start unbolting everything, you really can't be too careful when dealing with the highly compressed coils. we found the best location (after some time) for the jack is the farthest to the edge of the lower control arm. you will see four round headed studs there.
-unbolt the swaybar from the link
-disconnect the tie rod from the spindle. (No picture)
-remove the shock. there are two bolts on the underside of the lower control arm, and one bolt at the top of the upper coil bucket.
-at this point, i would recommend hooking some straps to the coil and to the frame to keep the coil from popping out. it is not 100% necessary, but as mentioned before, you really can't be to careful, and it only takes a couple seconds to put them on there. admittedly, we did this the first go-round, but not on the second.
-at this point, remove the brake caliper and rotor. once you are trying to remove and reinstall the coil, you will need as much stretch room to do so, and you risk breaking the brake line if the caliper is still connected as it does not have much slack to move. remove the two bolts from the back of the caliper and hang it out of the way with another strap or some zip ties.
-remove the bolt from the upper balljoint/control arm. Using a hammer, hit the spindle near the UCA ball joint stud. You can also use a pitman arm puller, but a hammer is much faster.
-once the upper control arm is seperated from the spindle, SLOWLY lower the jack releasing the tension from the coil. once the jack is out of the way, you will still need to push down on the LCA to get the coil out. here it is once out, with the stock rubber coil isolator on top. You can throw that away.
-here is the coil isolator next to one of the spacers
-the spacer on the top of the coil (DO NOT reinstall the factory isolator)
-we found that it helps to just shove the spacer up into the bucket and then put the coil in (the bucket will hold it in place).
-this is where you may find that you need to loosen the lower control arm bolts to allow it to swing down more. This will make more room to fit the coil in place.
Another option would be to use a set of coil compressors; however, that should not be necessary.
-once the coil is reseated in position, jack the lower control arm back up to secure it in place.
-replace the ball joint bolt through the spindle and rebolt. this will assure everything will stay in place.
-from there, reattach everything else.
-put the tire back on, bolt it up
-remove the jack stand and lower the truck on the ground
-retighten lugs
-repeat on other side.
After
Last edited by TXST8tj; 09-10-2018 at 05:12 PM.
#2
12-12-2006, 02:29 PM
Join Date: Mar 2006
Location: Katy, TX
Posts: 70
Likes: 0
Received 0 Likes
on
0 Posts
Post Installation Review
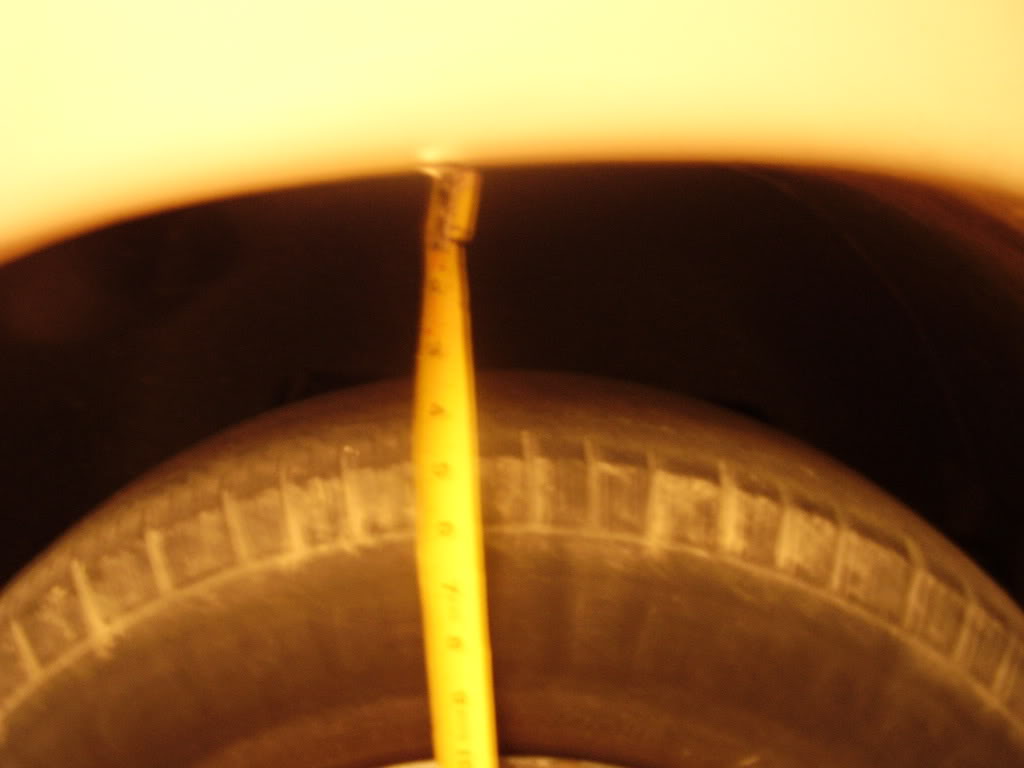
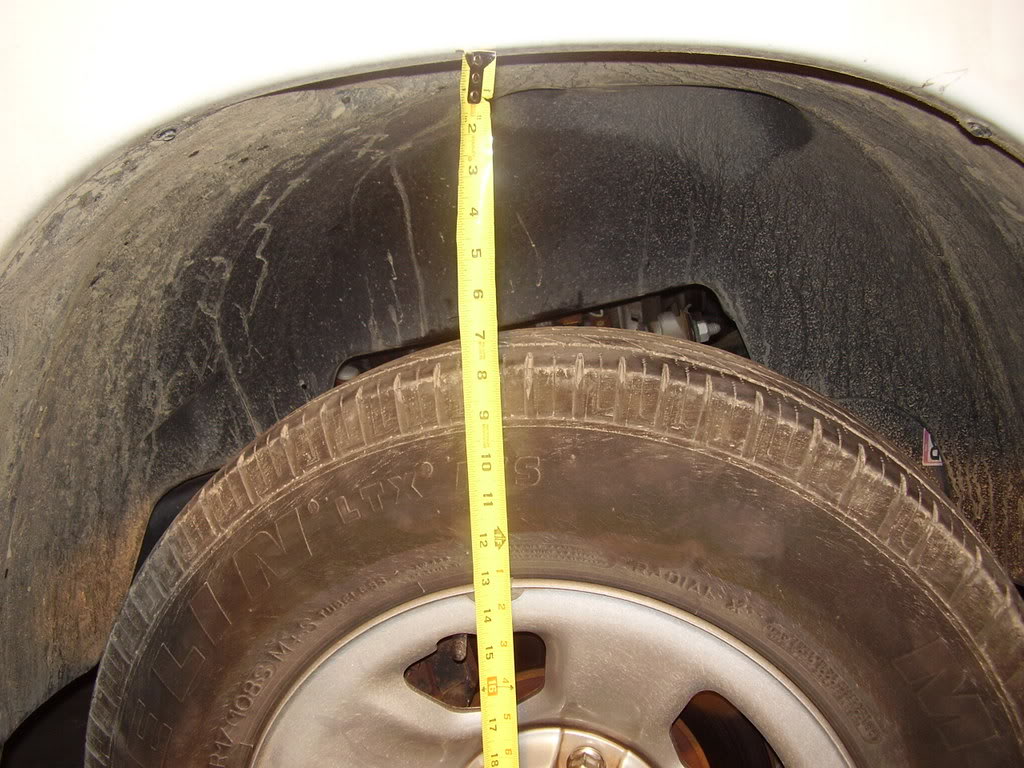
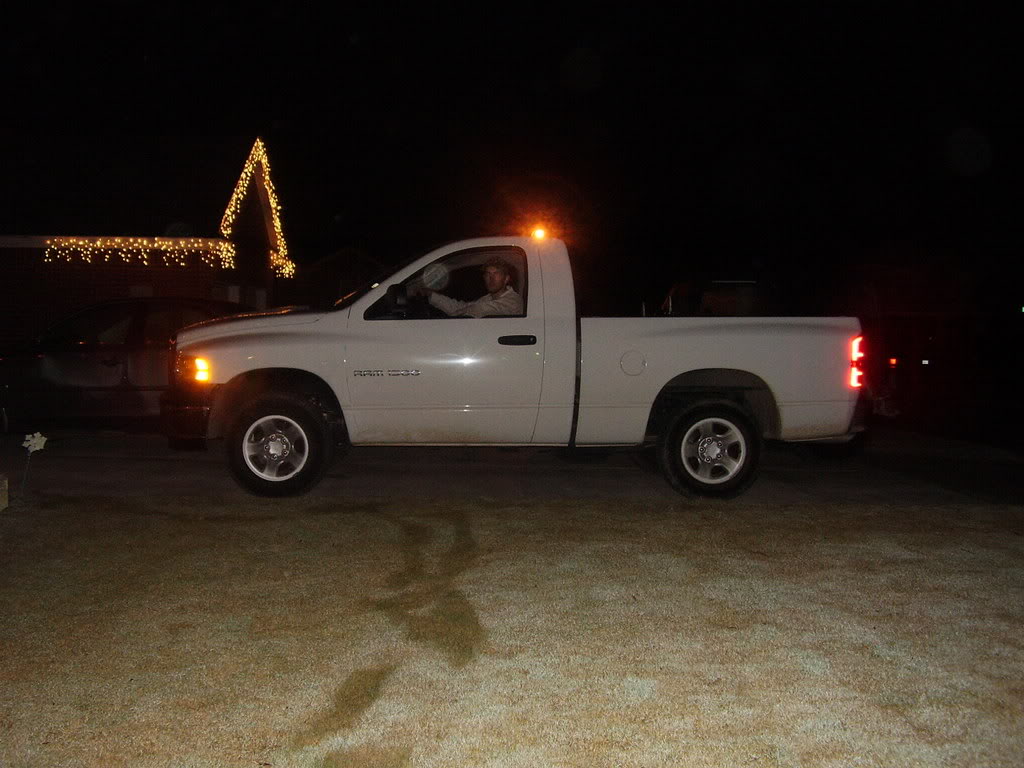
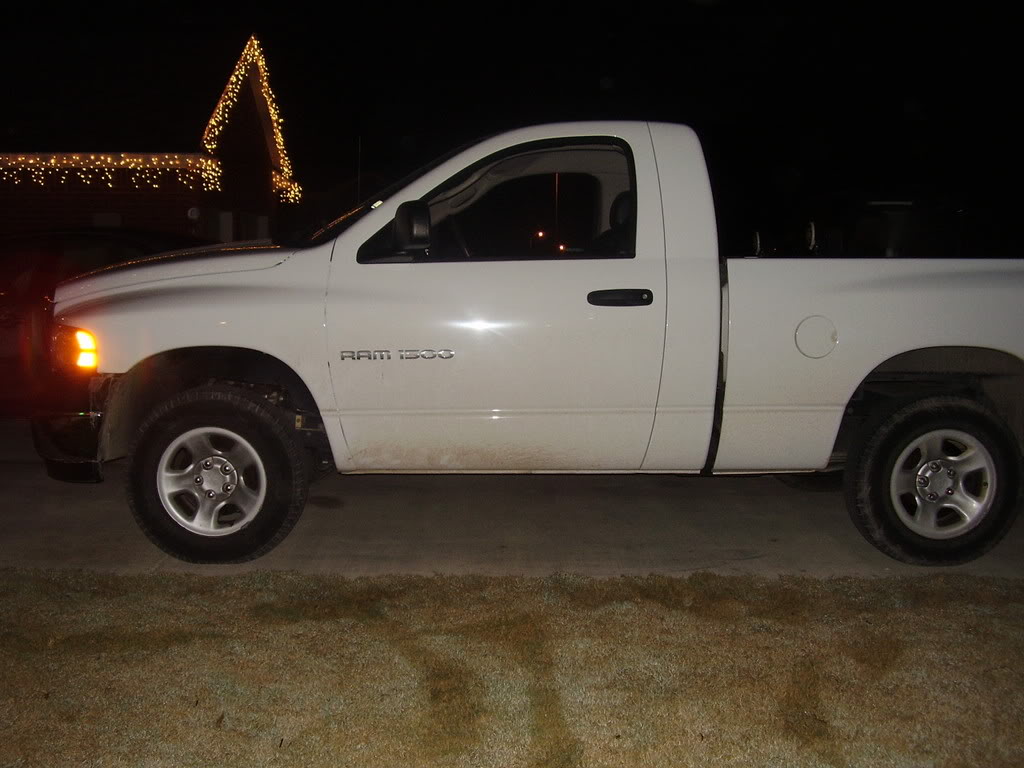
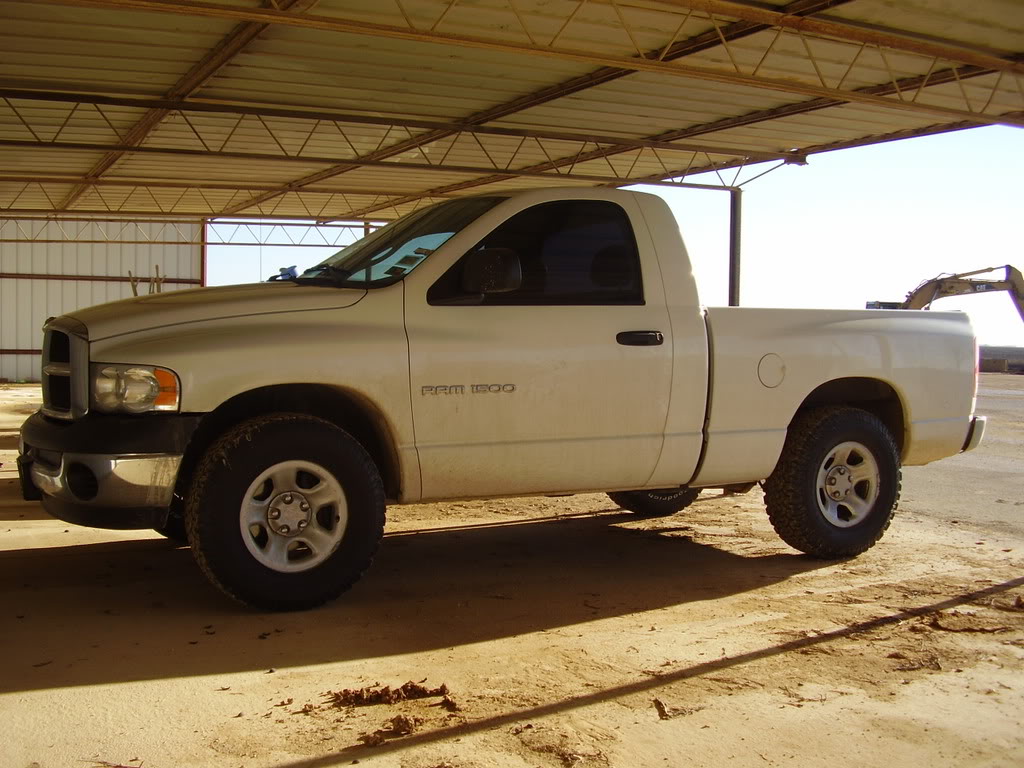
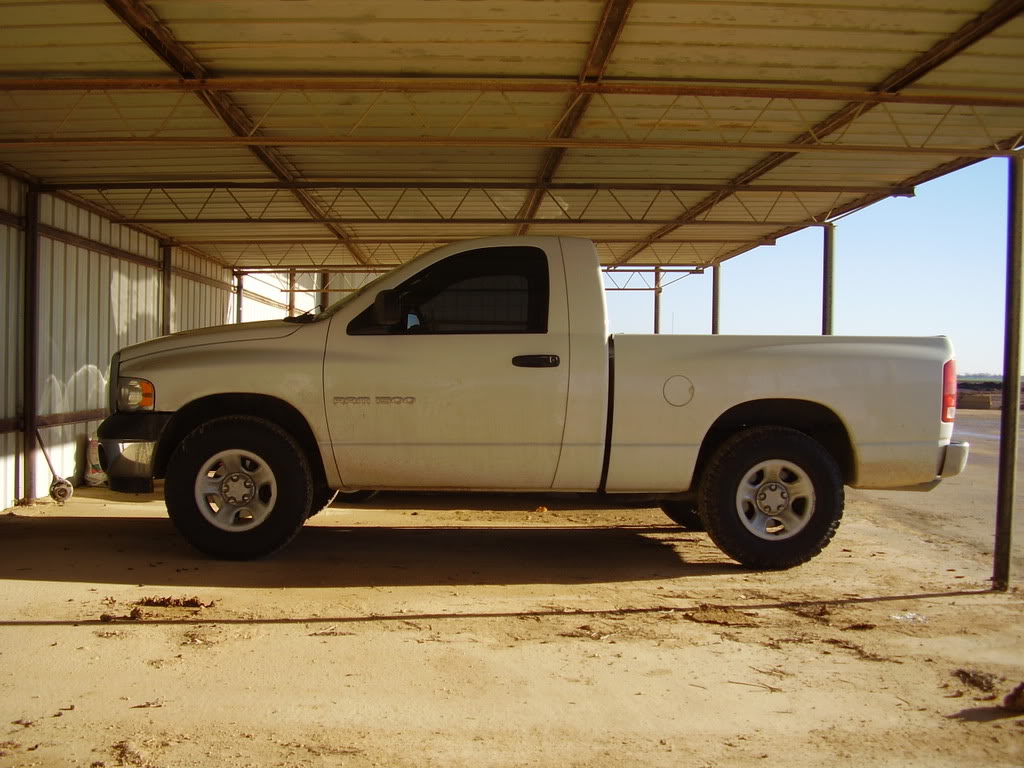
the difference is extremely noticeable from far away or close up. it's a different beast now. this is how it should look from the factory.
after looking over the before and after measurements, it appears it actually yielded 3" of lift in the front. anyway, it's level and that's what matters.
other than the shocks being stiff from being stretched more and not having much travel, the truck rides the same. it still needs an alignment, but the actual drive characteristics are the same as stock. the shocks will soon be replaced with an aftermarket stock length long travel shock. while the shock will be stock length, it will likely extend a bit more to aid in more comfort on the road.
the first side took a couple hours with starting the install, having to make a tool trip for the pitman arm puller, dinner, and a couple other little hang ups along the way. the second side was done start to finish in under 30 minutes.
if we were to do this again, i have no doubt it could be finished in an hour.
i can't imagine spending more than $80 on a spacer lift. spacers of the same material, generally are created equal (and actually by the same manufacturer and repackaged). shop for the best price and don't overpay.
next steps for the truck are new wheels and tires and possibly a body lift. this is just a pavement pounder, but it will look nice doing it. as it sits now, it can fit 33s with no problem.
#3
12-12-2006, 03:30 PM

thanks for the write up!
for 85 bucks this is definately worth the mod; i do think that i may replace the shocks with 2" longer shocks when i do it. Seeing done always alleviates some of the fear of tackling it yourself.
btw, most ppl suggest an alignment afterward; do you agree with this, or are you going to get one done?
for 85 bucks this is definately worth the mod; i do think that i may replace the shocks with 2" longer shocks when i do it. Seeing done always alleviates some of the fear of tackling it yourself.
btw, most ppl suggest an alignment afterward; do you agree with this, or are you going to get one done?
#4
12-12-2006, 03:59 PM
Join Date: Mar 2006
Location: Katy, TX
Posts: 70
Likes: 0
Received 0 Likes
on
0 Posts
i definitely think it's worth it, and even more worth it if you do it yourself. there is no need to pay someone a few hundred dollars to do this for you. i've done tons of lifts myself ranging in type and size. i always think it's helpful to have some personal directions and pictures to go along. it just takes away some of the question of whether or not it's doable. i generally make it common practice to document the work to maybe lend a hand over the internet to others i can't physically lend a hand to. if i can save at least one person from paying someone else to do the work for them, it's worth it to me. there is so much to be learned about your vehicle by just trying stuff yourself.
you probably wouldn't realize it while doing the lift, but you will actually have most of the steps to doing your own brakes done. there is just too much to learn to let someone else do it.
longer shocks really are needed. the stock shocks are long enough to reach and bolt back in, but they create a very stiff ride because they have no more travel. as long as you're not trying to go jumping in your truck, a longer shock should not pose an issue, but should help soften up the ride. we're shopping for new shocks as i'm typing this.
i also stress the importance of an alignment anytime front suspension or steering work is done. the geometry is not going to be the same after it has been messed with. trust me, $60 for an alignment now is better than a few hundred to replace your unevenly worn tires in a matter of weeks.
#6
12-12-2006, 06:10 PM
Join Date: Mar 2006
Location: Katy, TX
Posts: 70
Likes: 0
Received 0 Likes
on
0 Posts
#7
01-29-2007, 02:29 PM
Join Date: Mar 2006
Location: Katy, TX
Posts: 70
Likes: 0
Received 0 Likes
on
0 Posts
it's been a while since i've been on here, but everything is done for now....suspension and tire wise. we ended up going with some cheapo ProComp ES3000 shocks. $35 a piece from 4wp. hate that place, but they have cheap stuff SOMETIMES. anyway, they are 2" longer which was really needed. the ride with the stock shocks was bearable, but very stiff. the stockers were maxed out and had no travel to dampen the ride.
next up was the tires. got BFG AT 285/70r17s (33"). perfect size, great tire. found the wheels, but he's not sure if he wants to spend the money on them.
next up, spray-in bedliner and toolbox.
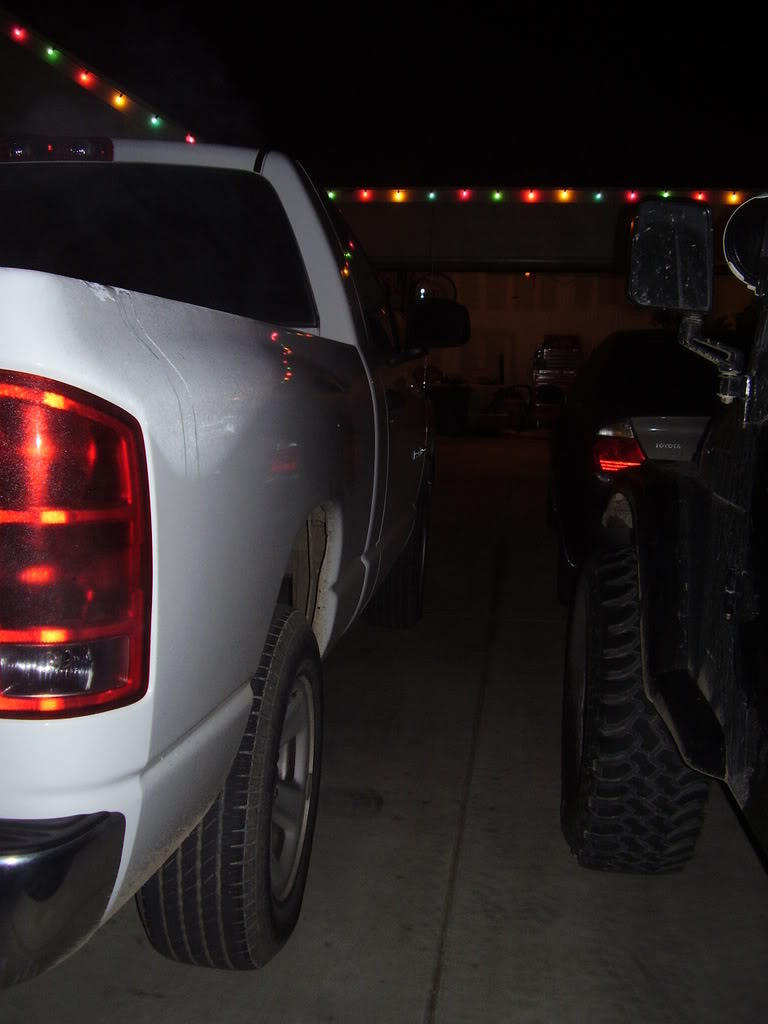
dirty pics from work, but that's all we have right now.
next up was the tires. got BFG AT 285/70r17s (33"). perfect size, great tire. found the wheels, but he's not sure if he wants to spend the money on them.
next up, spray-in bedliner and toolbox.
dirty pics from work, but that's all we have right now.
Trending Topics
![rob[GL]'s Avatar](data:image/svg+xml;utf8,<svg xmlns='http://www.w3.org/2000/svg' viewBox='0 0 50 50'><circle class='avatar-circle-default' fill='%23d23ab9' cx='25px' cy='25px' r='20px'></circle><text class='avatar-text-default' x='49%' y='53%' fill='white' text-anchor='middle' alignment-baseline='middle'>r</text></svg>)
#9
01-29-2007, 05:37 PM
Join Date: Mar 2006
Location: Katy, TX
Posts: 70
Likes: 0
Received 0 Likes
on
0 Posts
#10
01-29-2007, 06:39 PM
Captain
Join Date: Jan 2007
Location: Las Vegas, NV
Posts: 505
Likes: 0
Received 0 Likes
on
0 Posts

