
DIY 2010 5.7 Sparkplug Change
#1
 05-22-2011, 12:56 PM

This will take 1.5 to 2.5 hours; depending on your experience and breaks. You will need:

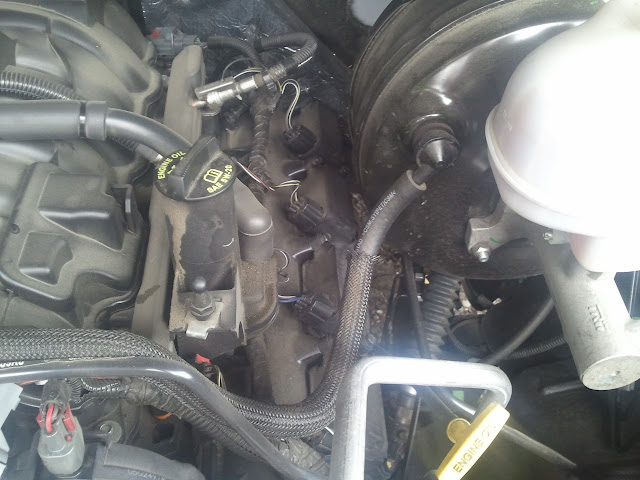
I choose to do the harder side first, the driver side. (Note the oil around the oil fill neck; this is what happens when you let someone else change your oil)
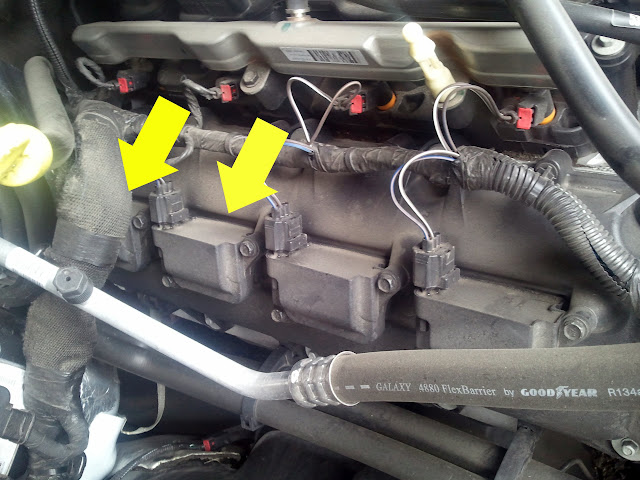
Back out the 2 bolts holding the coil pack in (note that they are just snug, not insanely tight, return the favor when you reinstall them) and remove the wireharness that plugs into the coil pack. I forgot to take a photo of the coil pack out, but there is 2 black pieces of rubber about 4" long that come out with it. They house the wire that connects the sparkplug to the coil. You will have to take several of these out at angles. The most difficult one to remove is the passenger side next to the firewall.
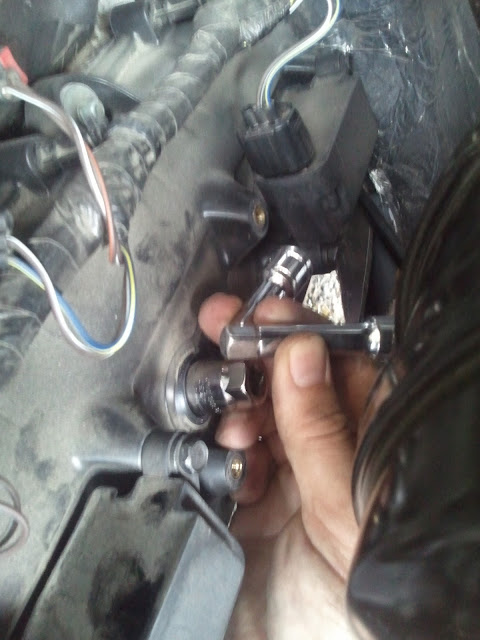
In this photo I have already dropped the sparkplug socket in the hole. For many of these you will have to work your tools in pieces, hence the reason for a 2" and 1" extention.
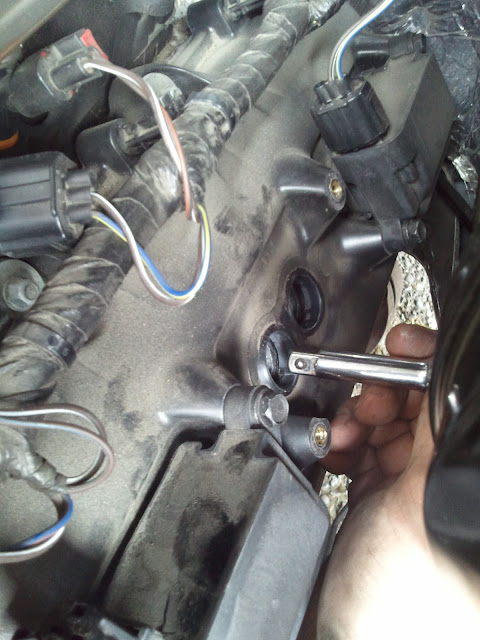
Put in your 2" extention and then your 1" extention (on some of these you can put the socket in with the 2" extention attached). Attach your ratchet and remove the plug. Be sure not to bust your knuckles, it's tight and there are a lot of sharp spots to remove skin on.
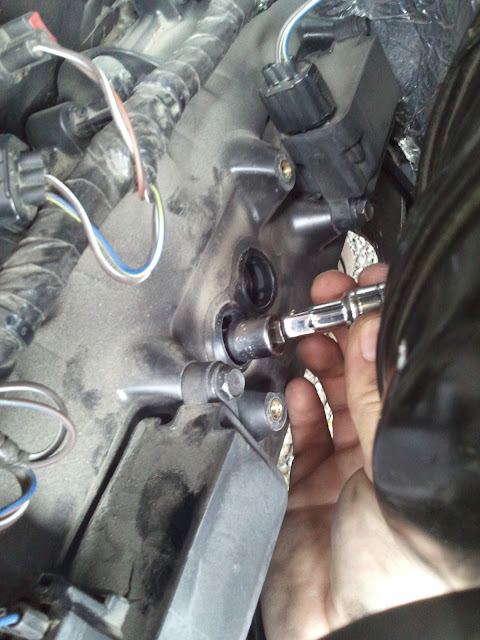
You will have to remove the plug and tools out in pieces
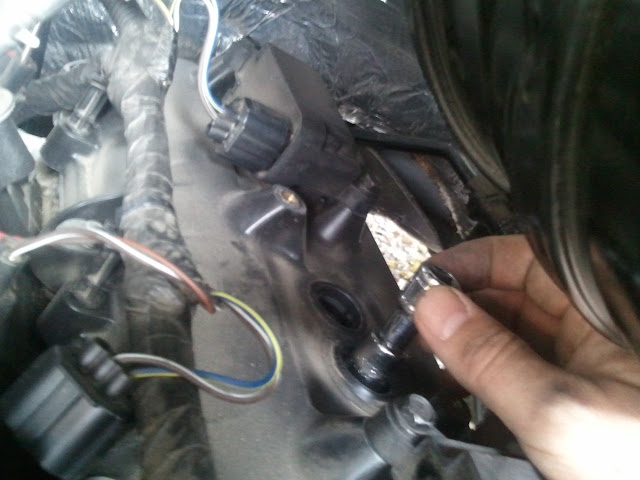


Be sure to put anti-seize on the threads so you won't have a frozen plug when you do this again in 30K miles. Gap each plug to 0.043, only 3 of the 16 were correctly gapped.

Be sure you put the plug back in with a standard socket, or you won't be able to get the socket back. Put each plug in by hand and try to not let it smash (fall) into the hole.

It's easier to do both the driver side and passenger side "firewall" spark plugs if you leave the coil packs off the one before.
Now on to the passenger side. This side is a breeze, except for the back two plugs. However, Dodge did a nice job routing the heater hoses and made the retaining clips easy to unlatch. You will want to open two of these clips, the one on the firewall and the next one closest to it.


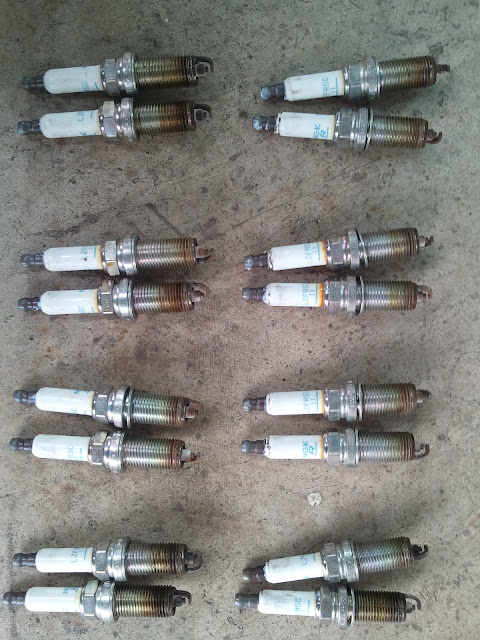
Here's all 16 plugs
Most of them look like this close up

Notes:
- Standard 3/8" ratchet
- 12" extention (for the easy ones)
- 2" extention
- 1" extention
- 5/8" sparkplug socket
- 5/8" deep socket
- Standard 1/4" ratchet
- Standard 10mm socket
- Slotted screw driver
- Anti-seize
- Sparkplug gapper
I choose to do the harder side first, the driver side. (Note the oil around the oil fill neck; this is what happens when you let someone else change your oil)
Back out the 2 bolts holding the coil pack in (note that they are just snug, not insanely tight, return the favor when you reinstall them) and remove the wireharness that plugs into the coil pack. I forgot to take a photo of the coil pack out, but there is 2 black pieces of rubber about 4" long that come out with it. They house the wire that connects the sparkplug to the coil. You will have to take several of these out at angles. The most difficult one to remove is the passenger side next to the firewall.
In this photo I have already dropped the sparkplug socket in the hole. For many of these you will have to work your tools in pieces, hence the reason for a 2" and 1" extention.
Put in your 2" extention and then your 1" extention (on some of these you can put the socket in with the 2" extention attached). Attach your ratchet and remove the plug. Be sure not to bust your knuckles, it's tight and there are a lot of sharp spots to remove skin on.
You will have to remove the plug and tools out in pieces
Be sure to put anti-seize on the threads so you won't have a frozen plug when you do this again in 30K miles. Gap each plug to 0.043, only 3 of the 16 were correctly gapped.
Be sure you put the plug back in with a standard socket, or you won't be able to get the socket back. Put each plug in by hand and try to not let it smash (fall) into the hole.
It's easier to do both the driver side and passenger side "firewall" spark plugs if you leave the coil packs off the one before.
Now on to the passenger side. This side is a breeze, except for the back two plugs. However, Dodge did a nice job routing the heater hoses and made the retaining clips easy to unlatch. You will want to open two of these clips, the one on the firewall and the next one closest to it.
Here's all 16 plugs
Most of them look like this close up
Notes:
- DO NOT use a locking extention; you might be able to get it in, but won't be able to get it back out
- DO NOT use the socket puller to put the sparkplug back in
- As for correctly tightening the new sparkplugs. I don't know how to describe it other than you want to feel the crush washer (also called the gasket) crush. Hand tighten each plug (with just the socket and extentions) then use the ratchet. DO NOT OVER TIGHTEN!
- I'm not an expert, just an idiot with tools. Call your dealership with any questions with possible warranty concerns; they'll try to talk you into bringing it there so they can spill oil all over your engine too. Your results may vary
The following users liked this post:
edp244 (06-23-2019)