


 08-14-2015, 05:26 PM
Last edit by: IB Advertising
See related guides and technical advice from our community experts:
Browse all: Steering & Suspension Guides
- Dodge Ram 2002-Present: How to Replace Ball Joints
Step by step intructions for the do-it-yourself repairs.
Browse all: Steering & Suspension Guides

DIY Ball Joint Replacement
#1
04-12-2009, 12:01 PM


Work in progress
DIY Ball Joint swap
Truck: 2005 Dodge Ram 2500 4x4
Ball Joints:
Lowers: Moog K7467
Uppers: Carli heavy duty's
Tools:
1 11/16" socket
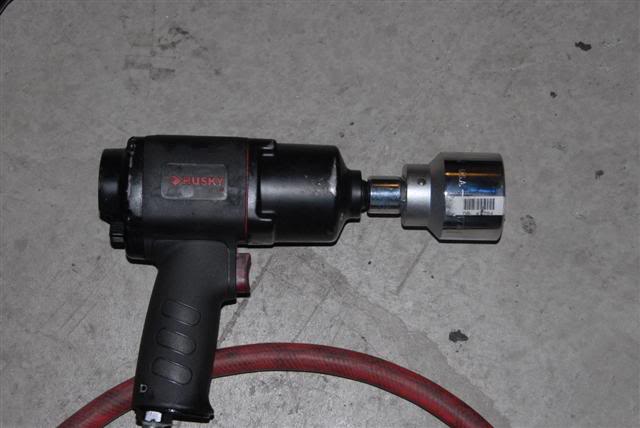
Impact Wrench
Torque Wrench to 250 ftlbs
Various sockets in 1/2 drive
Pickle fork
Ball Joint press with adapter kit
**** 1/2" to 1" pipe coupler *****
5mm allen socket
stubby 1/2 drive extension
Snap ring pliers
Shop manual
edit: ball joint adapter kit found at harbor freight tools... p/n 46389-4VGA
Advisory: Reference your shop manual for ALL torque specs
Jack up the wheel and support with jack stand.
Note: Make sure the side you are working on is at least 3" higher than the other side. this will allow you to remove the axle without any loss of fluid from the diff.
Remove the wheel
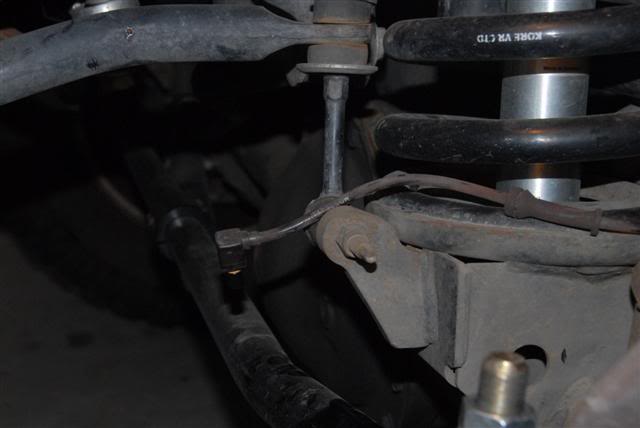
Disconnect steering linkage from steering knuckle
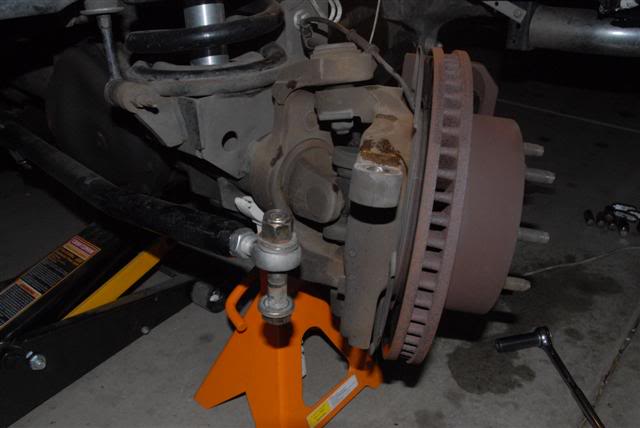
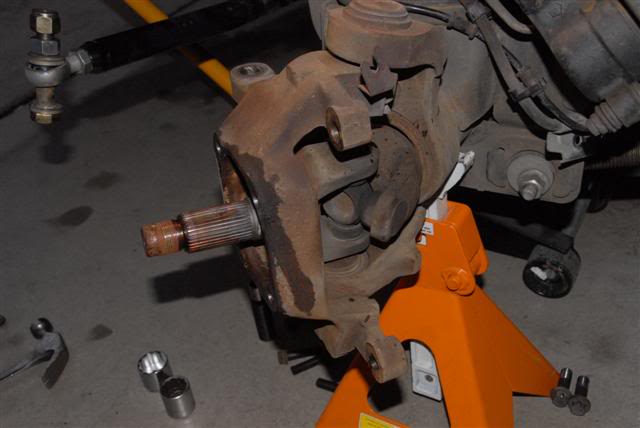
Remove Brake Caliper and using a high tech support device (aka metal hanger) tie it off so that it does not stress the brake lines and is out of the way. (18mm)
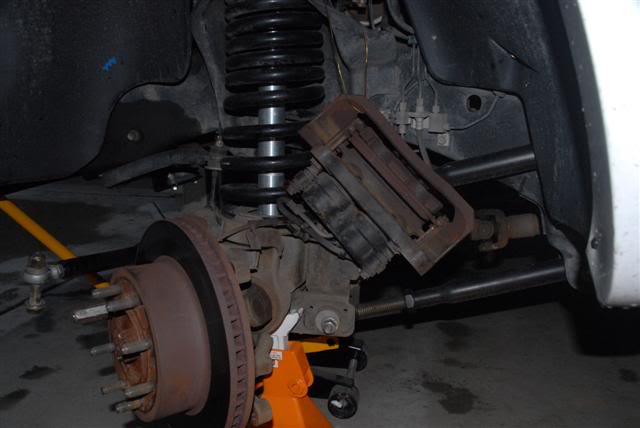
Remove the Brake Line support bracket (13mm)

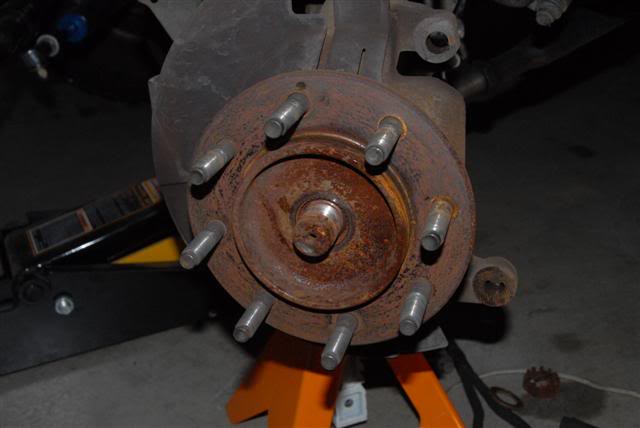
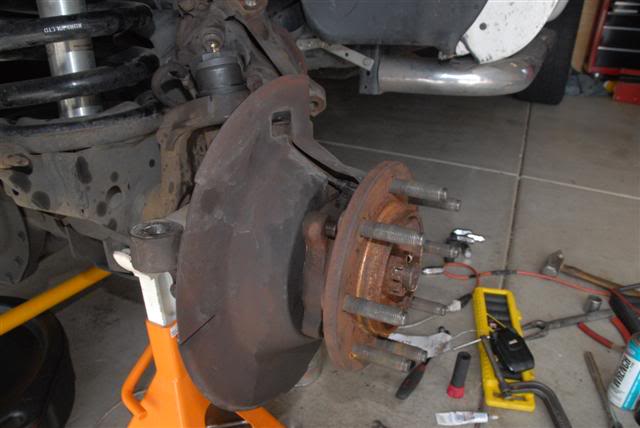
Remove the brake rotor
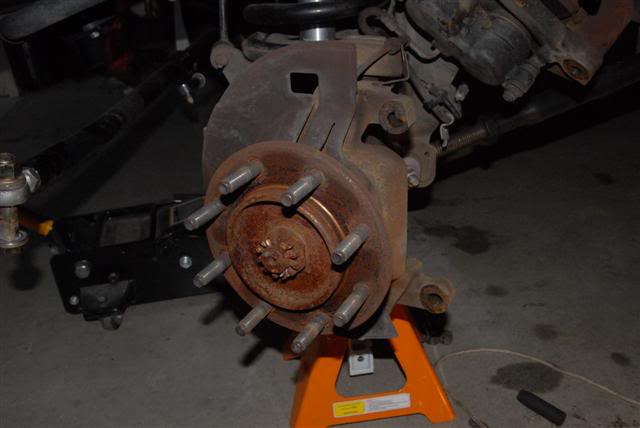
Remove the cotter pin from axle nut Using the 1 11/16" socket & impact wrench, remove the axle nut
Remove the ABS sensor using 5mm allen socket and route wiring & sensor so they are out of harms way.
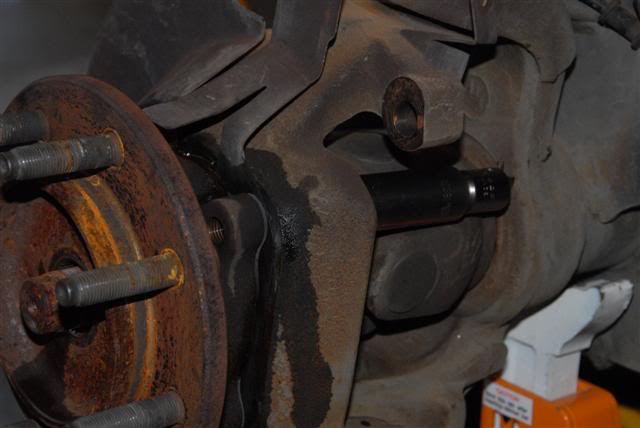
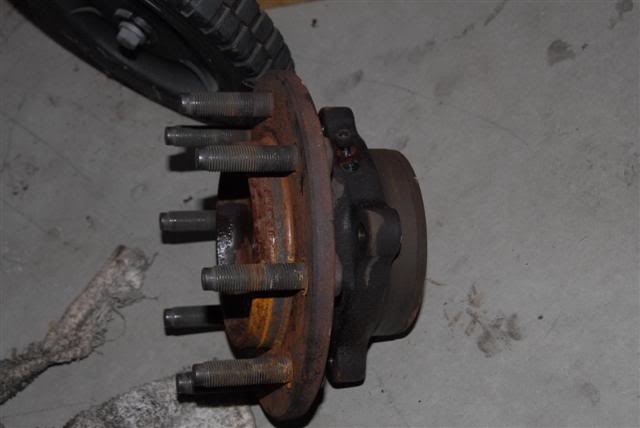
Loosen all 4 hub retaining bolts, back them all out about 1/4"
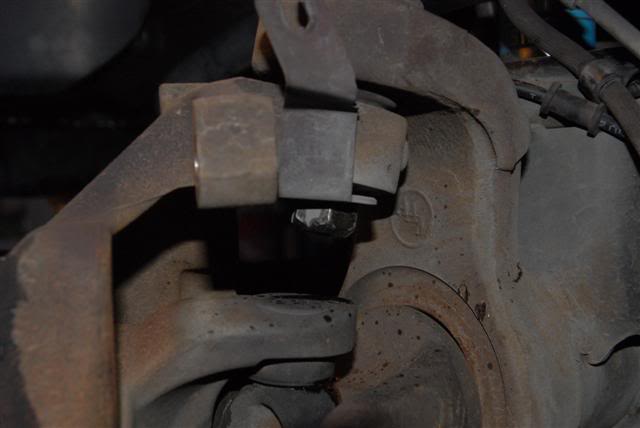
Place socket with extention on bolt as indicated in picture and start engine.
rotate steering wheel so that the socket & extension make contact with the axle yolk and apply more pressure (gently) with steering wheel to break free the hub off the axle.
Do this for all 4 bolts. And be gentle with it.
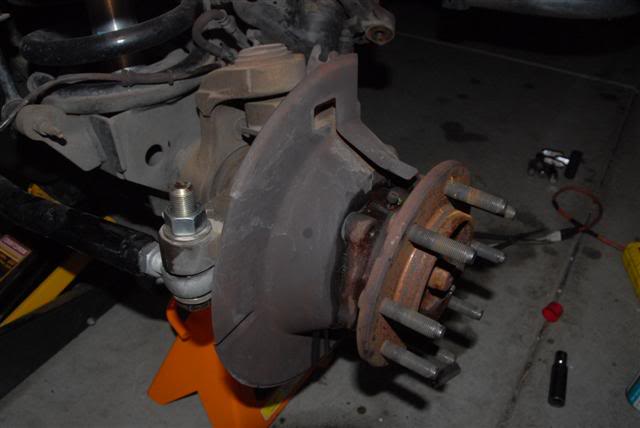
Back out the 4 bolts another 1/4~1/2" and repeat until the hub is free enough for you to slide it off the axle
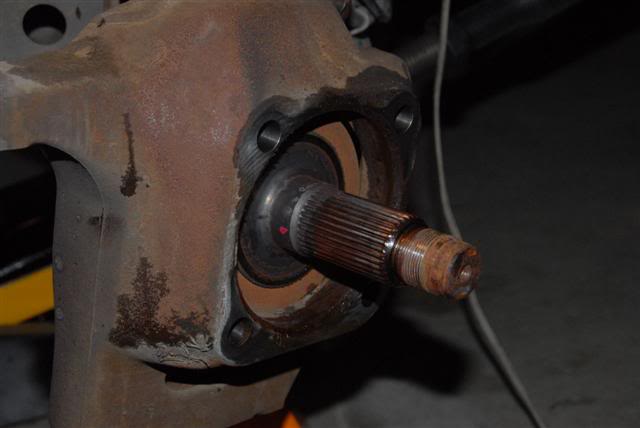
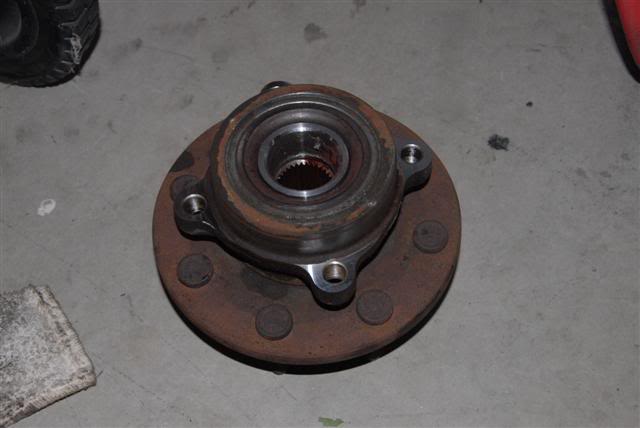
Once the hub is free you should be able to pull it off the axle.
Remove the dust shield when removing the hub
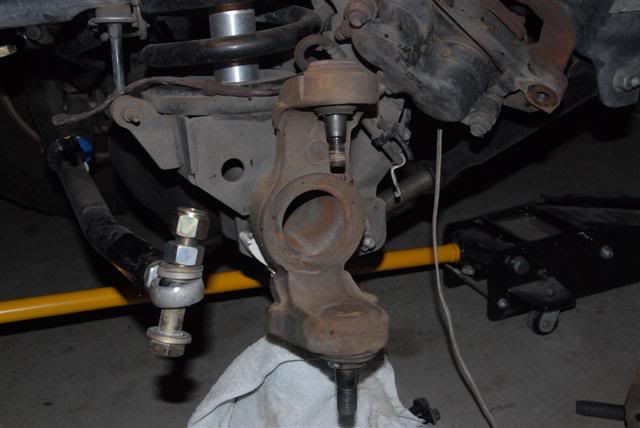
Loosen but do not remove the upper Ball Joint nut
Back out nut until it is near the end of the ball joint shaft
Remove the cotter pin and loosen but do not remove the lower ball joint nut
Back out nut until it is near the end of the ball joint shaft
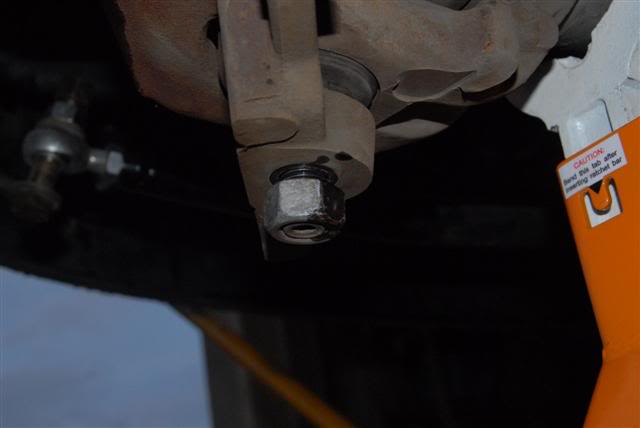
Using a pickle fork, break free both upper and lower ball joints
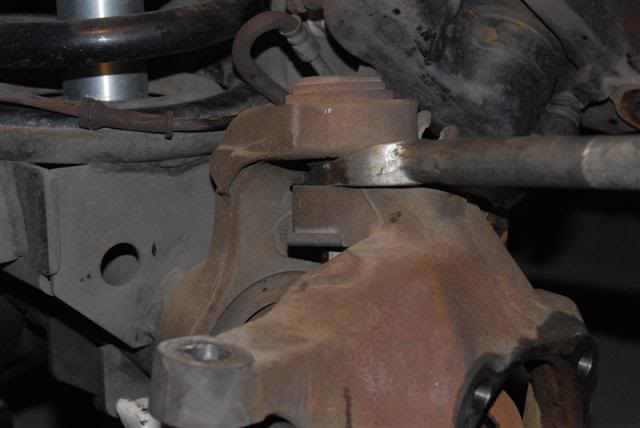
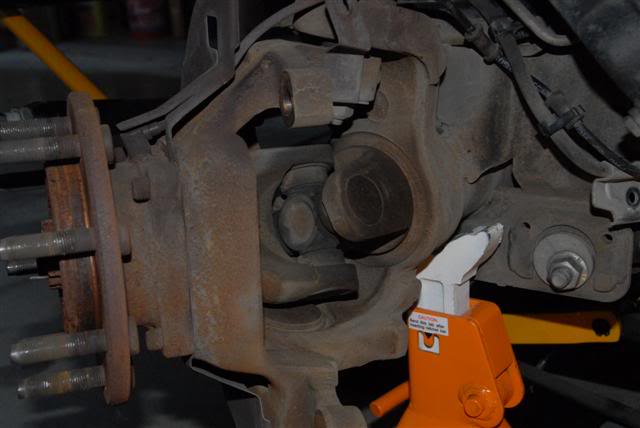
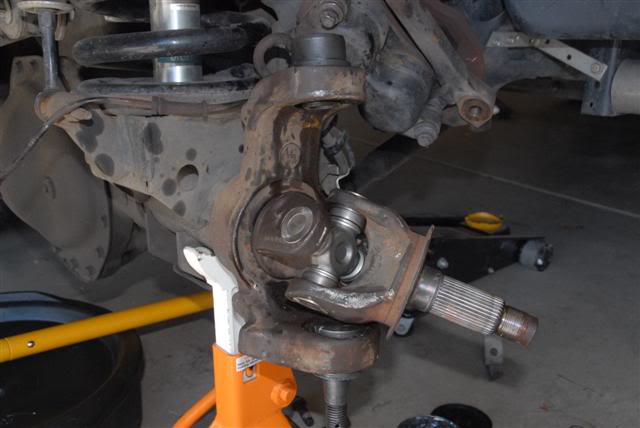
Once both are free, remove both nuts and remove the steering knuckle
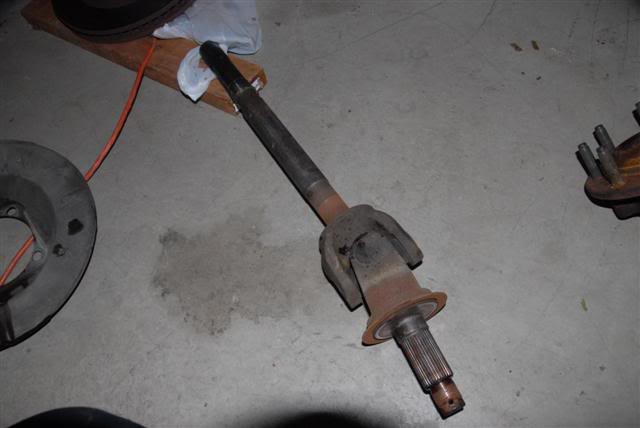
Using a large screwdriver, pop out the axle by applying outward pressure on the axle yolk where it sits next to the diff housing. It will pop out easily with a little pressure.
<get pic from other side & put here>
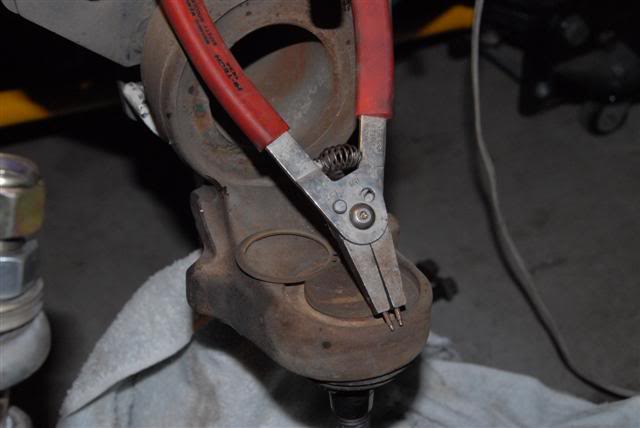
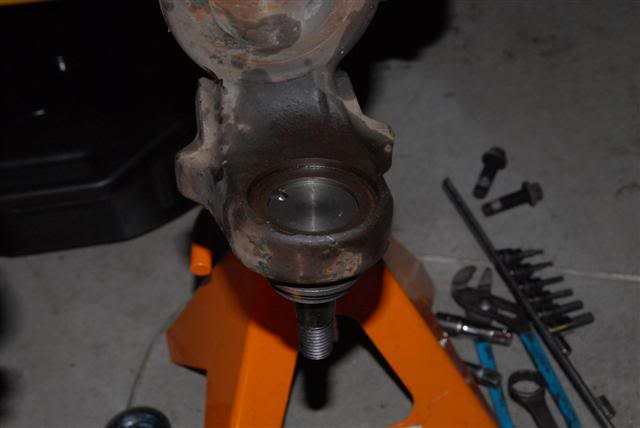
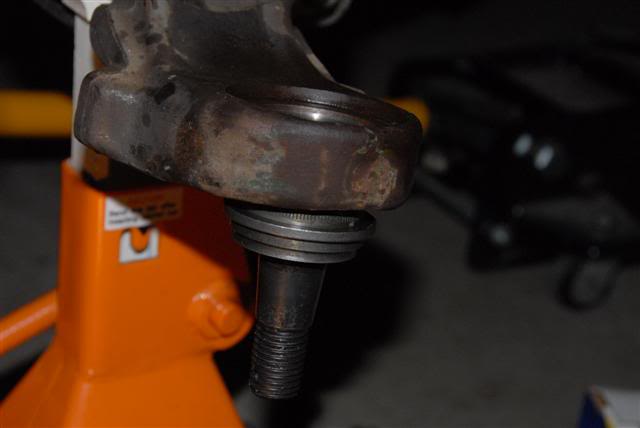
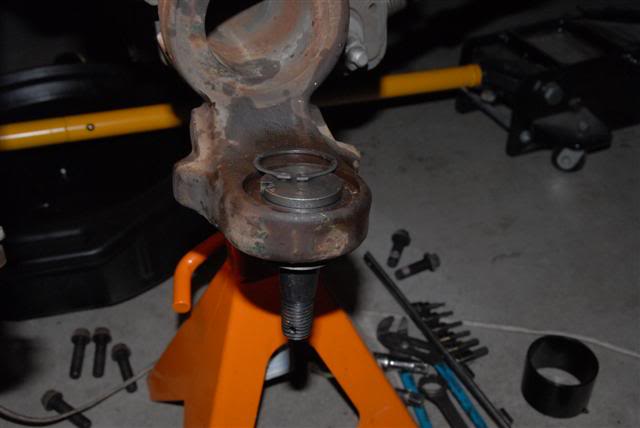
Using the snap ring plyers, remover the snap ring fromt he lower ball joint
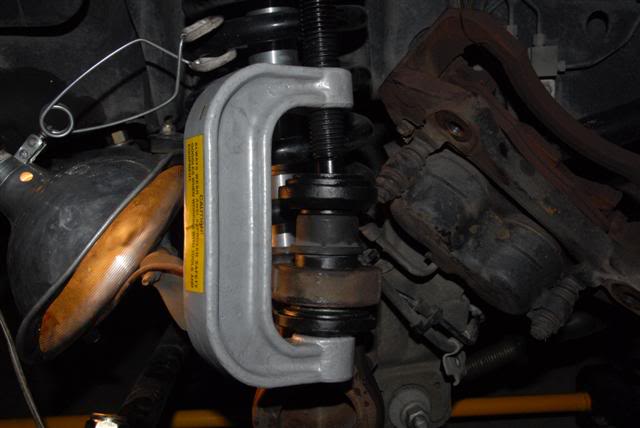
Using ball joint press, remove the upper ball joint. it comes out from the top and you will need the pipe coupler to help press it out all the way. when I did mine the adapters I had for
the press did not have the reach needed to push the joint out all the way.
<get pic from other side & put here>
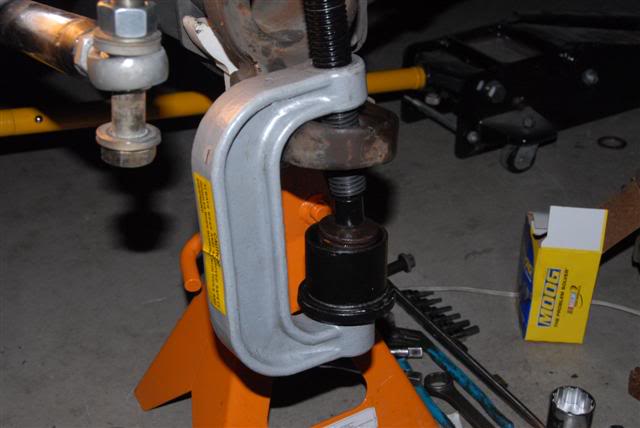
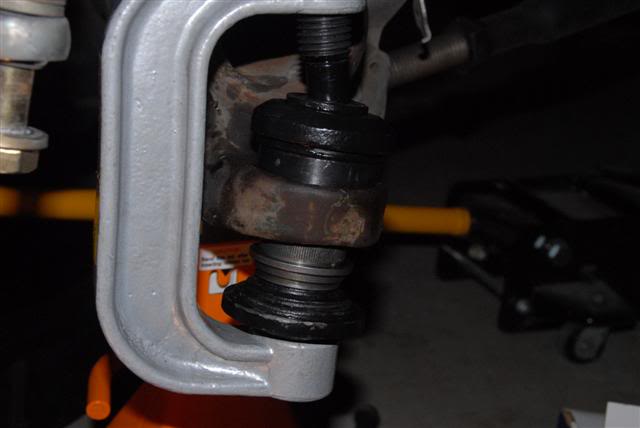
Using ball joint press remove the lower ball joint. It comes out from the bottom. As you can see in my pic, I had to do it without the piece for the top as the reciever tube I had was not
shallow enough to allow me to use it.
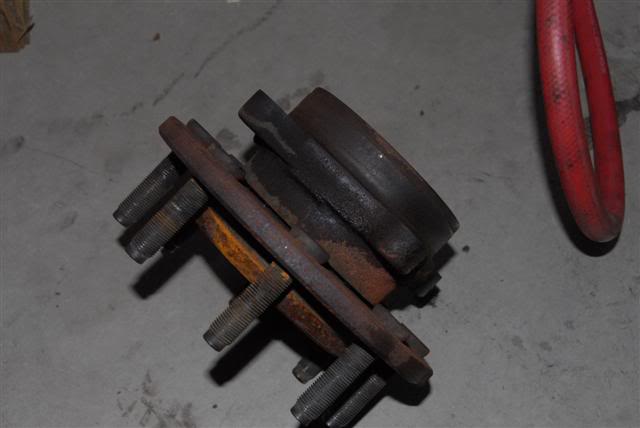
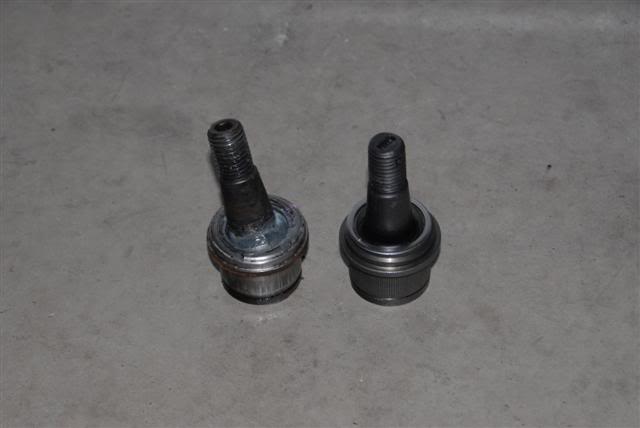
Lower ball joint comparison. my lower joint was incredibly loose. I was told that the lowers rarely go bad but after removing this one, I question that.
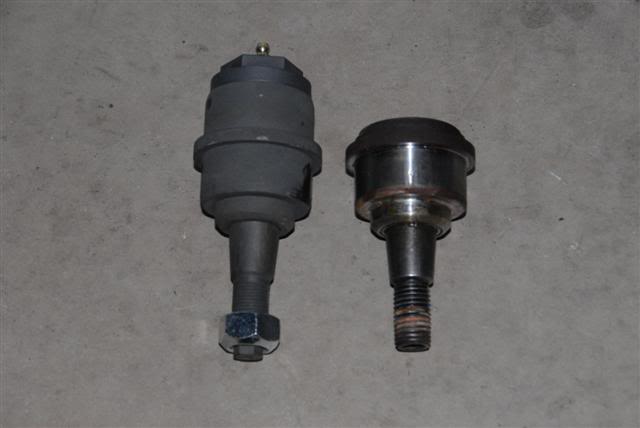
Upper ball joint comparison. my upper joint had shaft play up & down and side to side.
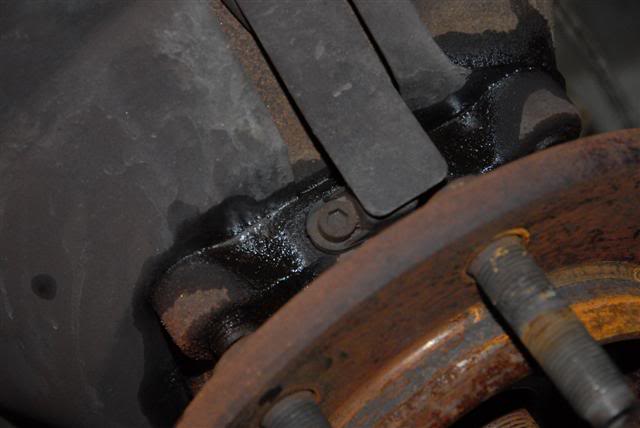
Using ball joint press, isntall lower ball joint and ensure zerk fitting is pointing towards the front of the truck, pics show it clocked incorrectly, I removed it and reset it's position.

Install Snap Ring on lower ball joint.
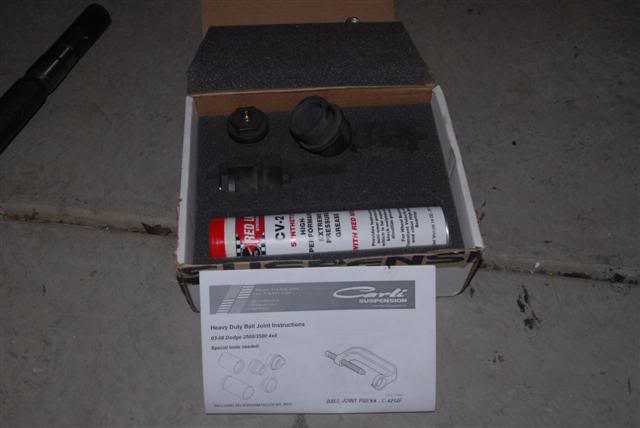
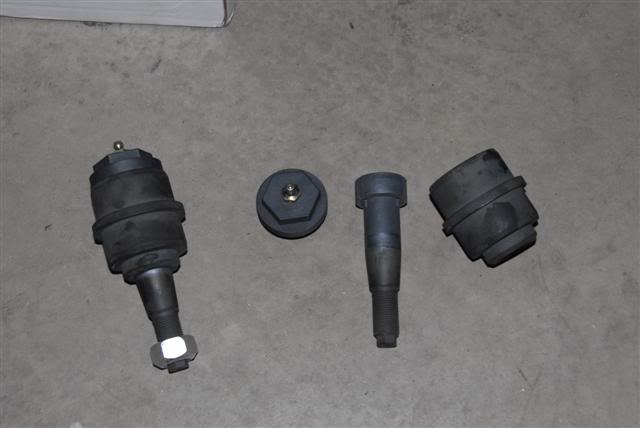
Carli Ball joint kit
Install the upper ball joint
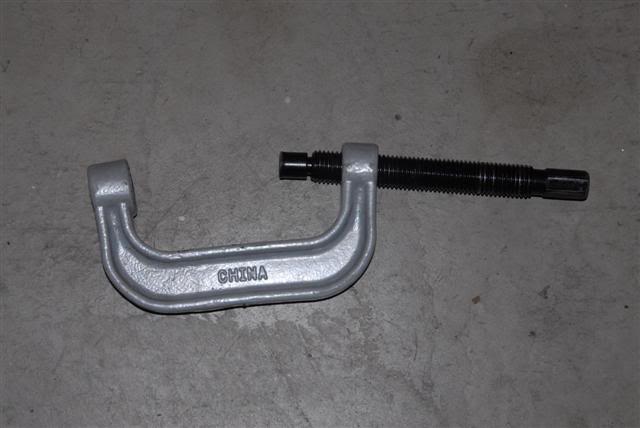
be prepared to bend your press... I bent 2 of them as they were cheepies. You can rent them from Autozone (west coast) and it is the same press so expect it to bend.
Install the axle back into the diff housing and use caution to not nic the seal during the insertion. It sits way back there by the gears. you will need to rotate the axle to line up the
splines prior to pushing it all the way in. It does not take alot of force to push in.
Install dust boot onto lower ball joint
Install steering knuckle back onto upper & lower ball joints. Reference manual for torque specs.
My '05 called for 70 ftlbs upper & 140-160 ft lbs lower
Install cotter pin into lower ball joint. you may need to tighten nut more to have access to the hole (never loosen to gain access to this hole for the cotter pin).
Install hub bolts back thru steering knuckle and install dust shield.
Install hub back on to axle and ensure ABS sensor mounting location is on the top.
Tighten hub bolts and torque to spec (149 ftlbs for my truck).
Install axle nut and torque to 132 ft lbs. Reference manual for torque specs.
Rotate hub several times (5~10x) to reseat the bearing.
Retorque axle nut to spec (263 ftlbs for my truck). Reference manual for torque specs.
Install hub retaining bolts and torque to spec. Reference manual for torque specs.
Install ABS Sensor back into hub
Install brake line bracket
Install rotor and put 1 lug nut on to secure rotor while installing brake caliper
Install brake caliper and torque bolts to spec
Remove lug nut and mount wheel
Remove jackstand
Jack up other side of axle and check for leaks coming from the axle you just worked on.
If no leaks present, your done, time for a beer.
more info from another thread...
https://dodgeforum.com/forum/2nd-gen...nced-help.html
DIY Ball Joint swap
Truck: 2005 Dodge Ram 2500 4x4
Ball Joints:
Lowers: Moog K7467
Uppers: Carli heavy duty's
Tools:
1 11/16" socket
Impact Wrench
Torque Wrench to 250 ftlbs
Various sockets in 1/2 drive
Pickle fork
Ball Joint press with adapter kit
**** 1/2" to 1" pipe coupler *****
5mm allen socket
stubby 1/2 drive extension
Snap ring pliers
Shop manual
edit: ball joint adapter kit found at harbor freight tools... p/n 46389-4VGA
Advisory: Reference your shop manual for ALL torque specs
Jack up the wheel and support with jack stand.
Note: Make sure the side you are working on is at least 3" higher than the other side. this will allow you to remove the axle without any loss of fluid from the diff.
Remove the wheel
Disconnect steering linkage from steering knuckle
Remove Brake Caliper and using a high tech support device (aka metal hanger) tie it off so that it does not stress the brake lines and is out of the way. (18mm)
Remove the Brake Line support bracket (13mm)
Remove the brake rotor
Remove the cotter pin from axle nut Using the 1 11/16" socket & impact wrench, remove the axle nut
Remove the ABS sensor using 5mm allen socket and route wiring & sensor so they are out of harms way.
Loosen all 4 hub retaining bolts, back them all out about 1/4"
Place socket with extention on bolt as indicated in picture and start engine.
rotate steering wheel so that the socket & extension make contact with the axle yolk and apply more pressure (gently) with steering wheel to break free the hub off the axle.
Do this for all 4 bolts. And be gentle with it.
Back out the 4 bolts another 1/4~1/2" and repeat until the hub is free enough for you to slide it off the axle
Once the hub is free you should be able to pull it off the axle.
Remove the dust shield when removing the hub
Loosen but do not remove the upper Ball Joint nut
Back out nut until it is near the end of the ball joint shaft
Remove the cotter pin and loosen but do not remove the lower ball joint nut
Back out nut until it is near the end of the ball joint shaft
Using a pickle fork, break free both upper and lower ball joints
Once both are free, remove both nuts and remove the steering knuckle
Using a large screwdriver, pop out the axle by applying outward pressure on the axle yolk where it sits next to the diff housing. It will pop out easily with a little pressure.
<get pic from other side & put here>
Using the snap ring plyers, remover the snap ring fromt he lower ball joint
Using ball joint press, remove the upper ball joint. it comes out from the top and you will need the pipe coupler to help press it out all the way. when I did mine the adapters I had for
the press did not have the reach needed to push the joint out all the way.
<get pic from other side & put here>
Using ball joint press remove the lower ball joint. It comes out from the bottom. As you can see in my pic, I had to do it without the piece for the top as the reciever tube I had was not
shallow enough to allow me to use it.
Lower ball joint comparison. my lower joint was incredibly loose. I was told that the lowers rarely go bad but after removing this one, I question that.
Upper ball joint comparison. my upper joint had shaft play up & down and side to side.
Using ball joint press, isntall lower ball joint and ensure zerk fitting is pointing towards the front of the truck, pics show it clocked incorrectly, I removed it and reset it's position.
Install Snap Ring on lower ball joint.
Carli Ball joint kit
Install the upper ball joint
be prepared to bend your press... I bent 2 of them as they were cheepies. You can rent them from Autozone (west coast) and it is the same press so expect it to bend.
Install the axle back into the diff housing and use caution to not nic the seal during the insertion. It sits way back there by the gears. you will need to rotate the axle to line up the
splines prior to pushing it all the way in. It does not take alot of force to push in.
Install dust boot onto lower ball joint
Install steering knuckle back onto upper & lower ball joints. Reference manual for torque specs.
My '05 called for 70 ftlbs upper & 140-160 ft lbs lower
Install cotter pin into lower ball joint. you may need to tighten nut more to have access to the hole (never loosen to gain access to this hole for the cotter pin).
Install hub bolts back thru steering knuckle and install dust shield.
Install hub back on to axle and ensure ABS sensor mounting location is on the top.
Tighten hub bolts and torque to spec (149 ftlbs for my truck).
Install axle nut and torque to 132 ft lbs. Reference manual for torque specs.
Rotate hub several times (5~10x) to reseat the bearing.
Retorque axle nut to spec (263 ftlbs for my truck). Reference manual for torque specs.
Install hub retaining bolts and torque to spec. Reference manual for torque specs.
Install ABS Sensor back into hub
Install brake line bracket
Install rotor and put 1 lug nut on to secure rotor while installing brake caliper
Install brake caliper and torque bolts to spec
Remove lug nut and mount wheel
Remove jackstand
Jack up other side of axle and check for leaks coming from the axle you just worked on.
If no leaks present, your done, time for a beer.
more info from another thread...
https://dodgeforum.com/forum/2nd-gen...nced-help.html
Last edited by steve05ram360; 01-28-2011 at 12:07 AM.

#3
04-12-2009, 05:29 PM

#5
04-13-2009, 12:55 PM
thanks... no blood spilled on this one (yet). still working on the passenger side. bent the other press to the point where it is useless and will not put enough force on the lower ball joint to pop it out. Jason (owner of Dieselnutmotorsports) is going to let me "press" this thing back into shape. He's offered to lend me his ball joint press (which I might take him up on) if I feel I need it. I plan on re-inforcing this one and will see how that works.
My wife is dropping off the other axle to get the u-joint replaced on it this morning. Hopefully I'll be able to get there before they close (long drive) and have it on hand if I find the motivation to work on it tonight. time will tell...
My wife is dropping off the other axle to get the u-joint replaced on it this morning. Hopefully I'll be able to get there before they close (long drive) and have it on hand if I find the motivation to work on it tonight. time will tell...
#6
04-18-2009, 11:30 PM

Registered User
Join Date: Apr 2009
Location: Belmont, Ontario, Canada
Posts: 28
Likes: 0
Received 0 Likes
on
0 Posts
#7
04-19-2009, 04:44 PM

Registered User
Join Date: Apr 2009
Location: New Hampshire
Posts: 11
Likes: 0
Received 0 Likes
on
0 Posts
Hi Steve,
Your step by step is great. I recently failed inspection on my 03 RAM 2500 4x4 for balljoints (upper and lower RH) and am looking into replacing myself to save on labor costs. Your post should help me a great deal.
Questions:
Why both Moog and Carli? Cost or is there some other reason?
Do you need impact wrench to remove the axle or does it just make it easier? (I don't have compressor/impact wrench)
Thanks
Al
Trending Topics
#8
04-19-2009, 09:30 PM
hey guys... welcome to DF...
I used an impact wrench cause I have it and it'll take just about anything off and has made my life so much easier since getting it.
On the selection... the moogs, upper & lower were about the same cost, the Carli's however are supposed to be bullet proof. Not liking to do things twice, I'd rather spend the extra bux for the carli's & hope I never have to do the uppers again. the way they are built, I kinda doubt I will. the lowers are said to rarely wear out, however mine seemed to be shot IMO.
On the axle ujoints... I've done them in the past and could have done them myself, however decided to let someone else do them. When it comes time on the driveshafts, it'll go to the same shop.
#9
04-20-2009, 11:05 AM
Registered User
Join Date: Apr 2009
Location: Belmont, Ontario, Canada
Posts: 28
Likes: 0
Received 0 Likes
on
0 Posts
cool Steve, mine are also totally worn out...both uppers and lowers...I couldnt afford the carlis but went with ac delco up top and moogs on the bottom...and acdelco axle u joints..they seem to make a quality part...thanx for the great write up..I just covered my drivers side with penetrating oil where it needed to be and will get at this on thursday...again Thank you
#10
04-20-2009, 11:39 AM
